Instruments
As often as possible, I will be profiling one of the instruments I play. I'll be doing this mostly for the purpose of spreading general awareness but also I will give out crucial range and performance information for any composer who wishes to write new music for these instruments. Please check back regularly for updates!
To learn more about my teaching background and philosophy or to inquire about lessons, click here or contact me.
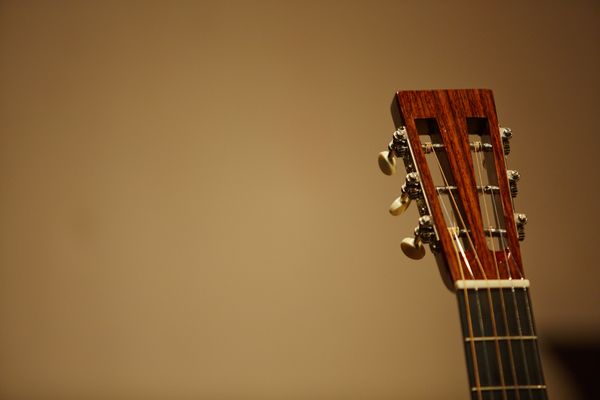
Photo by Kelly Davidson
Alterna-Telli
Tenor Guitar
Step 1: Find a master who can help you with the building process and a master wood worker who has a working wood shop and tools. Say, someone like Feridun Ozgoren and Fred Stubbs.
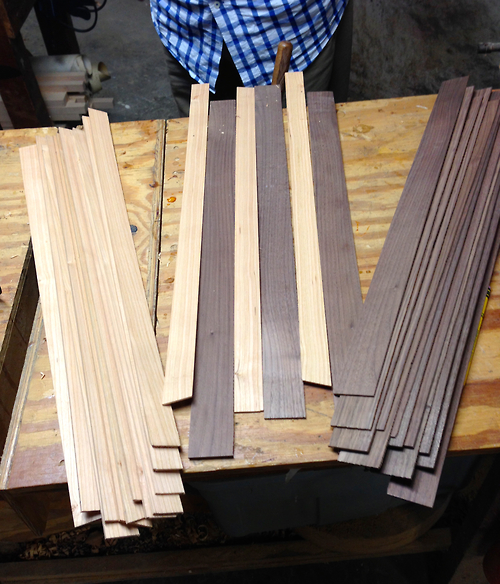
Step 2: Buy some appropriate hard woods for the instrument build (say walnut and cherry, with some maple thrown in) and some softer woods that are easy to work with to build the mold (say poplar, perhaps some plywood or particle board).
Step 3: Read some books.
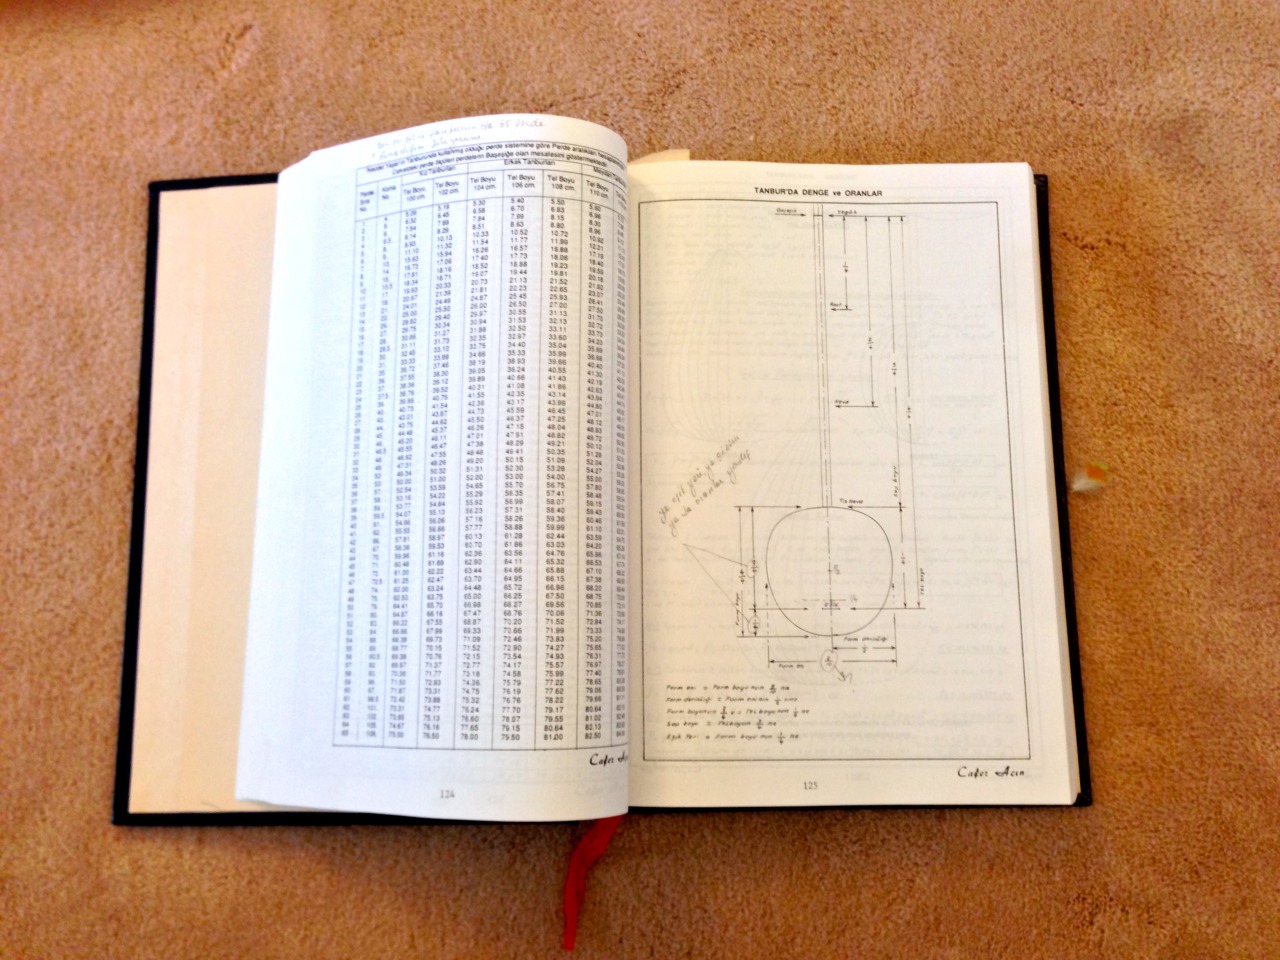
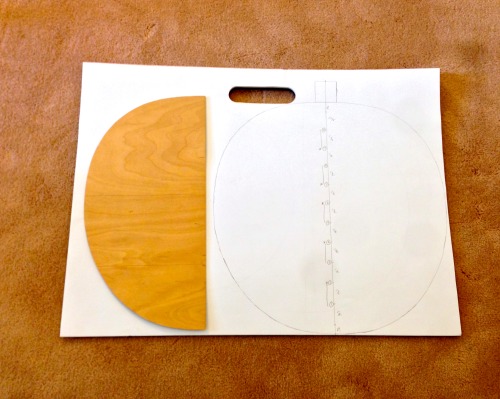
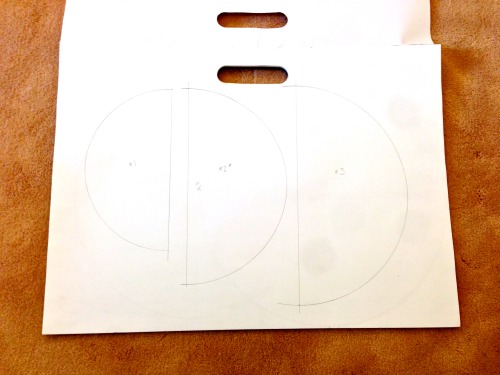
Step 4: Borrow your teacher’s template to do some drawings. Take some measurements and make some more drawings with a compass.
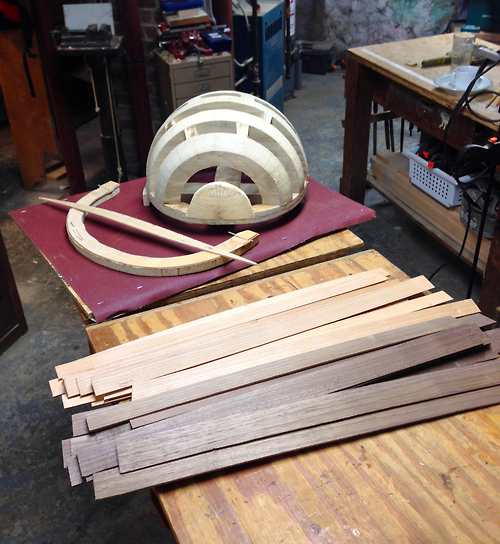
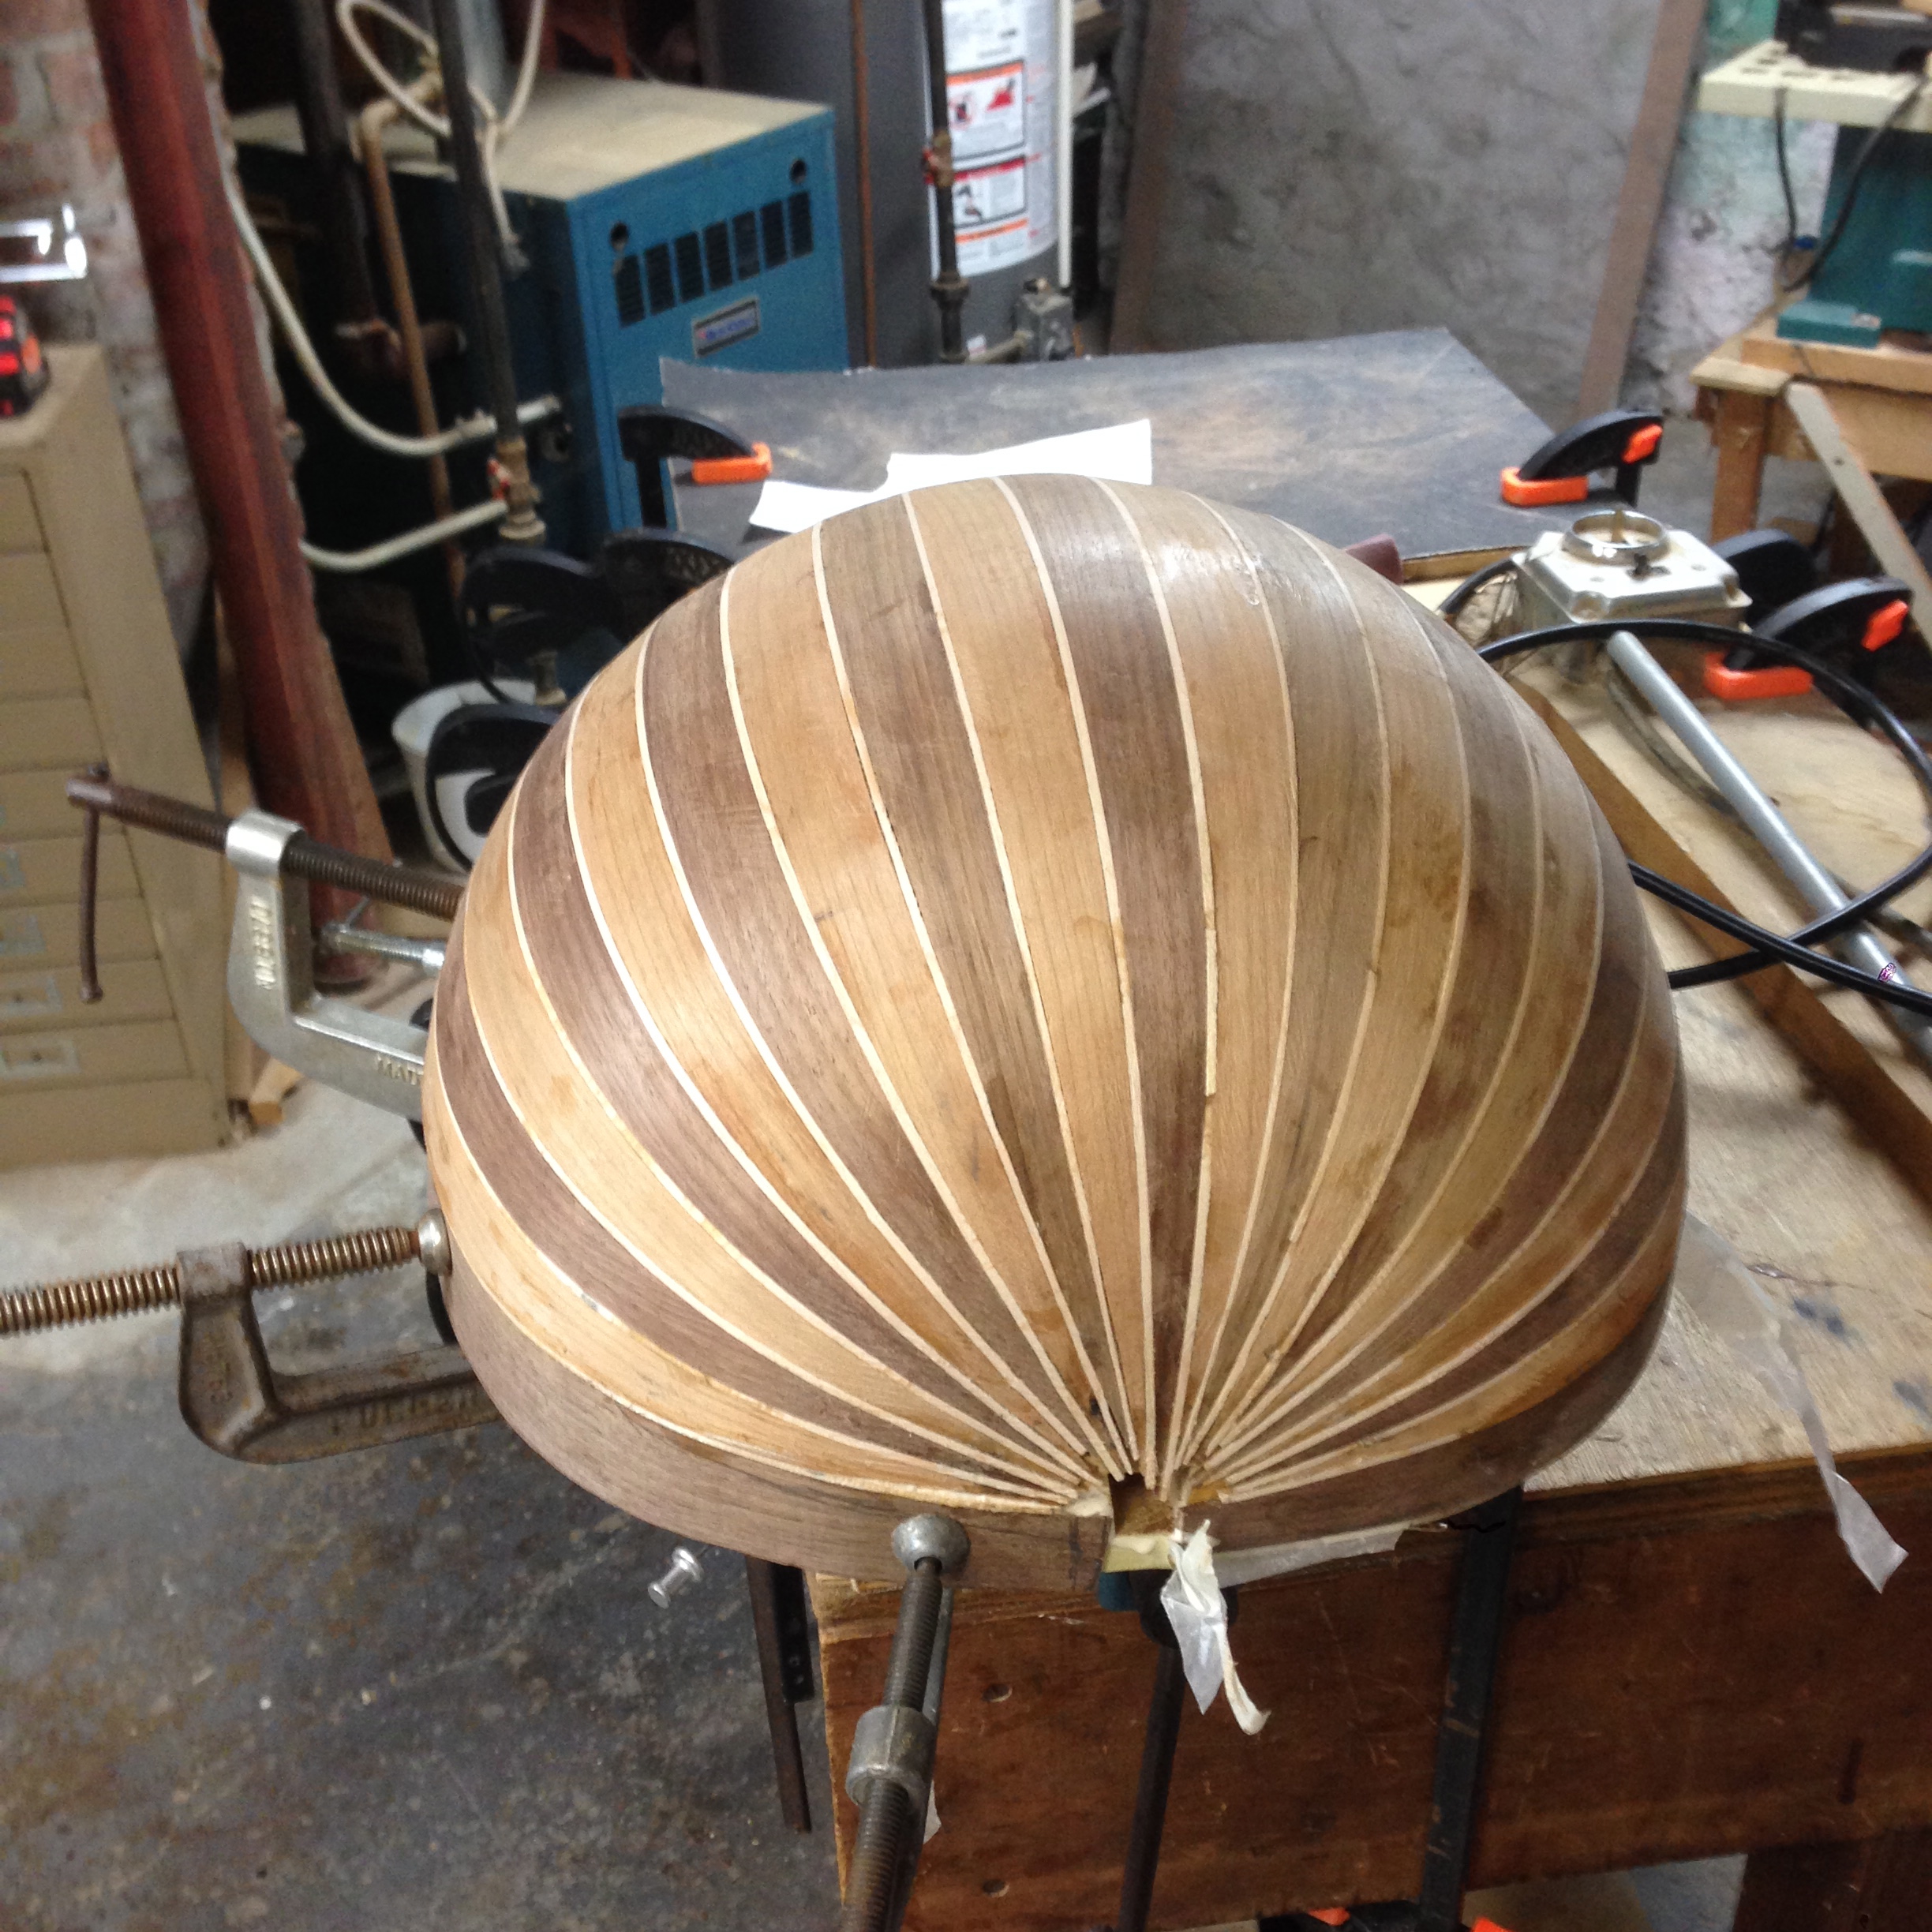
Step 5: Construct your mold that you will be using for all subsequent tanbur builds. Consists of end pieces and arches screwed on to a plywood base. Arches are separated by small spacers. A guide that exactly fits your template is nailed to the exterior of the mold so that it can easily move around the outside of your arches. This guide will aid in the rasping of the arches to fit the curve of the staves that will eventually be glued around the mold. Got all of that?! For me, this was about 12 hours of work with the help of my teachers.
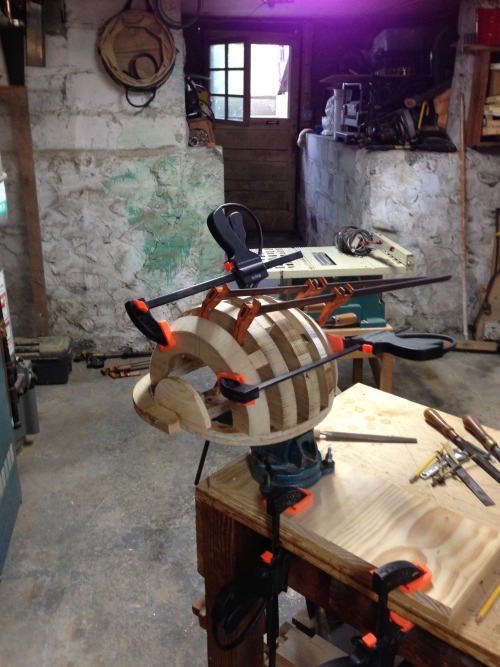
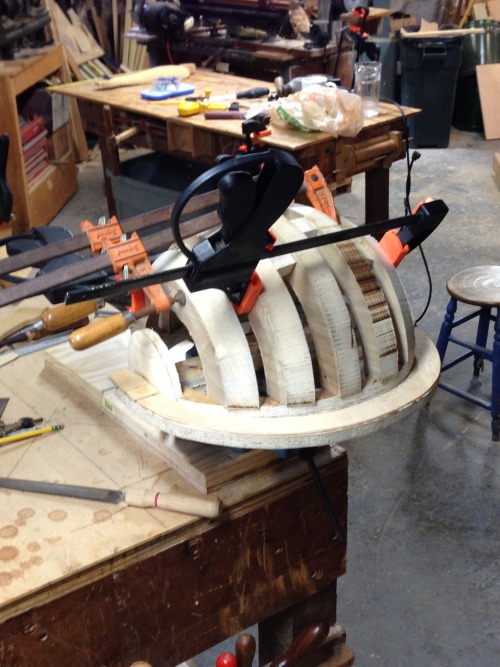
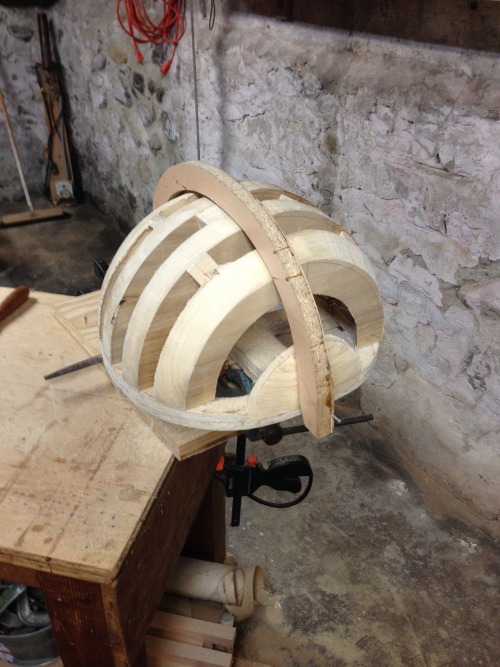
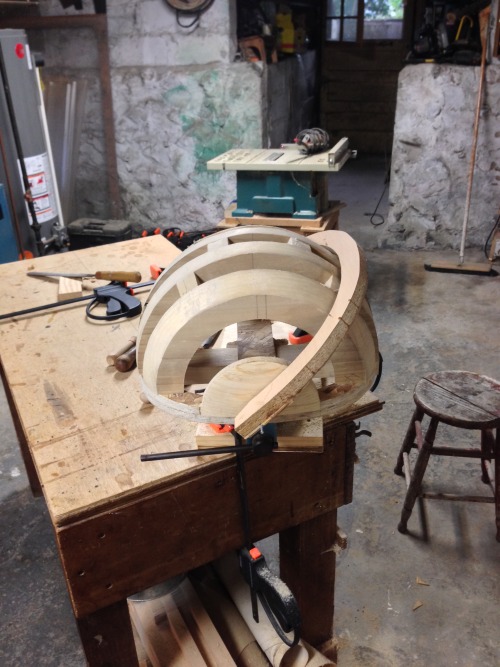
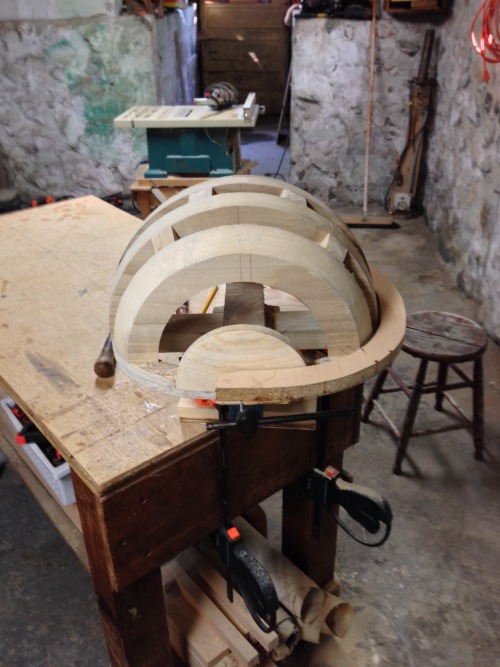
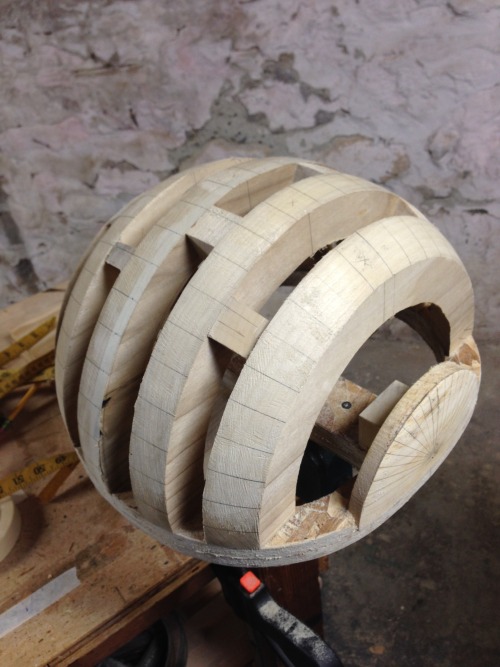
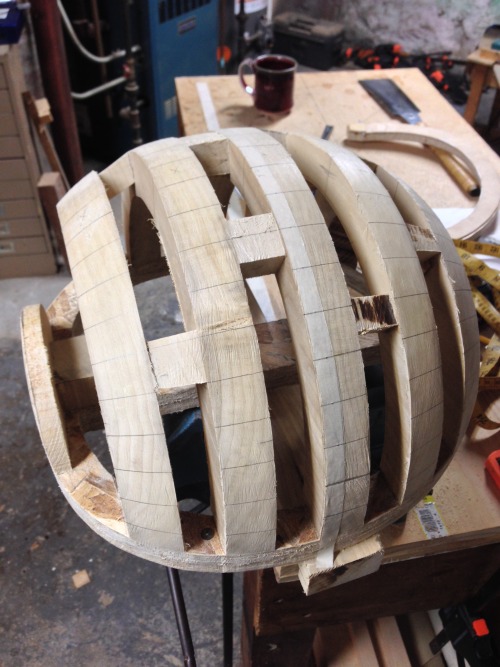
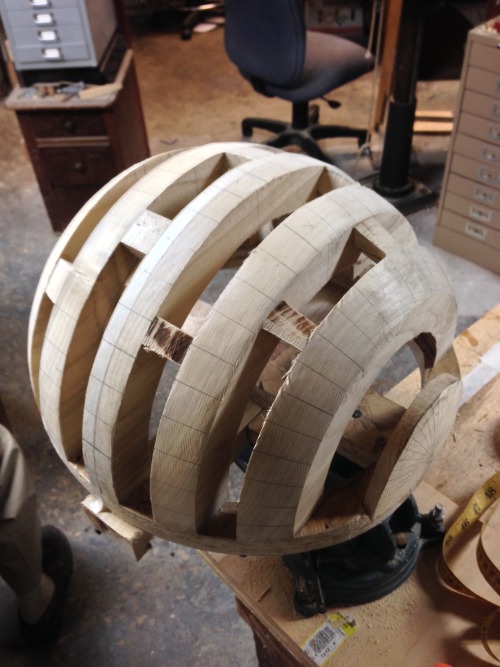
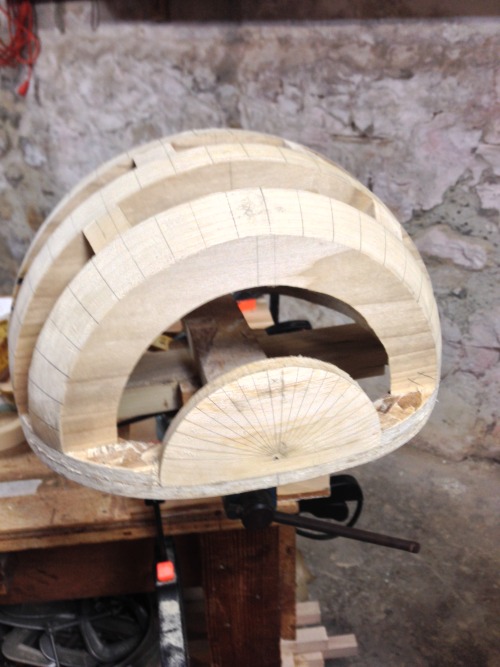
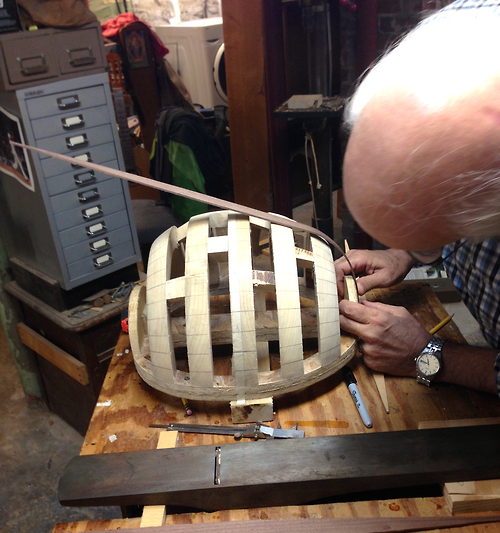
Step 6: Rasping madness! Using the exterior guide as a template, rasp the wood arches so they all fit underneath the guide. As you can see from the pics, the guide starts at one end of the mold and as you rasp the arches to fit underneath it, you are able to move the guide around the outside edge to the other side. This is a slow process of course, because you are constantly checking your work against the guide so you don’t over-rasp and create an uneven semi-circle on one of the arches. Remember, this mold will be your template for all future tanbur builds, so might as well take your time and do it right. Patience! These pics are after 3 hours, 6 hours, 9, hours, and 11 hours of work respectively.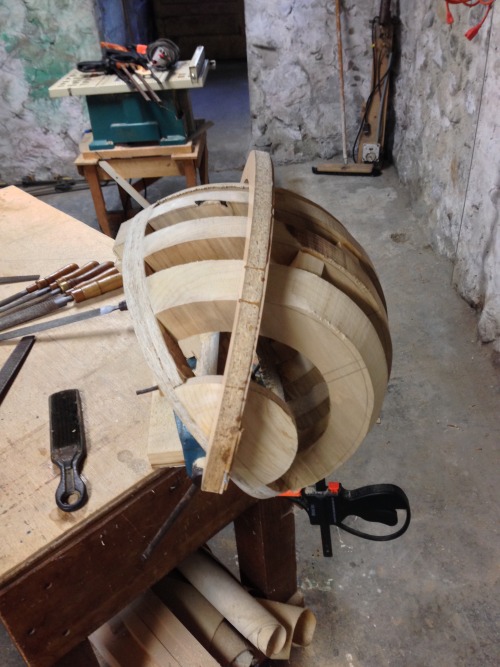
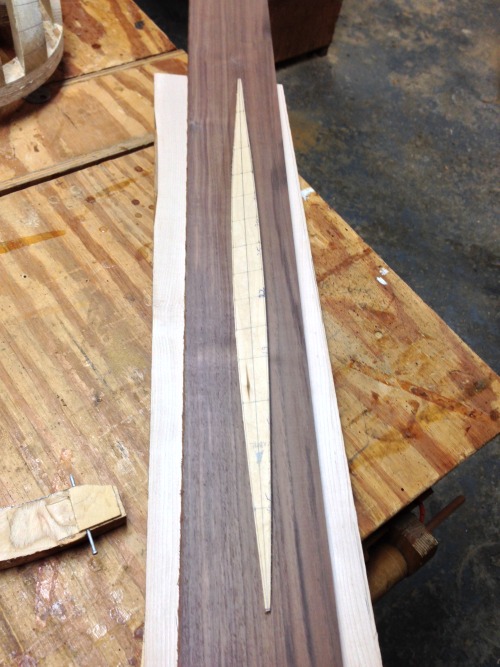
Step 7: Geometry and Master Stave Template! Now is the time to determine how many staves your tanbur will have. The most common are 19, 21 or 23. For this tanbur, we are doing 21 staves, which means 19 of equal dimensions and two on either side that are slightly larger in width. The first pic here shows some calculations we made after measuring the outer edge of the largest arch. These calculations are meant to determine the maximum width of each stave and the overall slop width of the added spacers (each spacer will be no more than 2 mm wide) between each stave. Using the guide (which has been removed for these pics), we then draw lines on the mold that correspond to our calculations. Our master stave template comes from the first stave at the top of the mold. Taking several measurements from each arch will yield the outline in the final pic here, which is our master stave template. We will use this template to cut our staves from the walnut (pictured underneath the template) and cherry wood we bought earlier. The next step will involve milling that wood and bending, shaping, and gluing our first stave.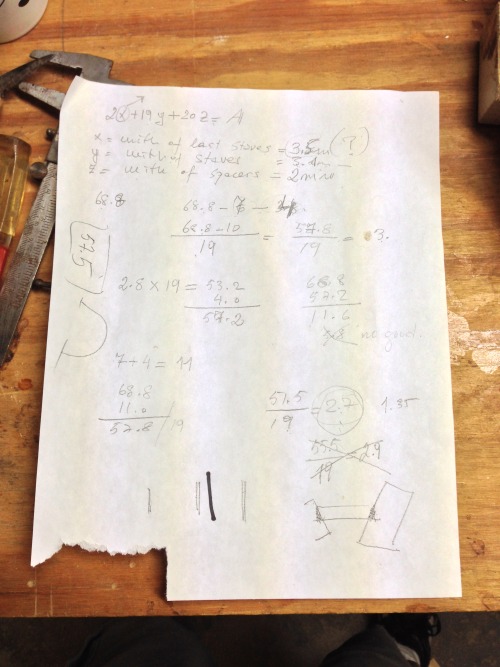
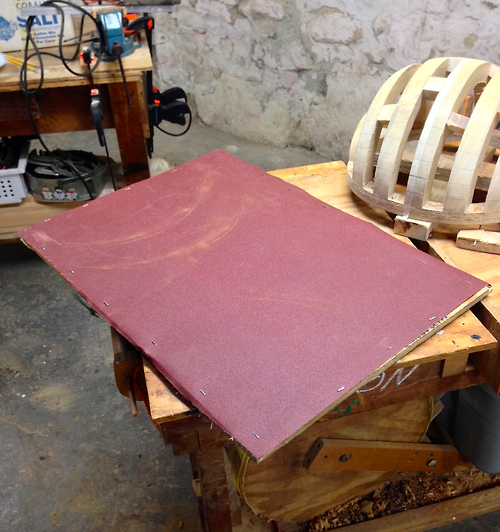
Step 8: Mill the wood for the staves and spacers, create a large stave sanding block. Now that we have a master stave template, we need to mill our walnut and cherry wood into pieces with the correct dimensions to make our staves. The same needs to be done with our maple for the small 2mm wide spacers we will put in between each stave. Using the band saw, we can cut pieces from our stock to the approximate width and length. The first pic here shows the milling process where one person feeds the wood and the other inspects afterwards to make sure that the milling is even and no major chunks have been taken out of the wood. Obviously, several passes are needed to do this to the correct thickness. The 2nd pic shows the finished product where we can start imagining what our cherry and walnut will look like side to side on the body of the tanbur. The 3rd pic is our new sanding board - just a large piece of plywood with two grains of sandpaper stapled to it on either side. This is a very important tool because we will use it to sand the curved staves in order to get the correct angle on the edge of each stave to glue them together properly. Without this sanding block, gluing together each stave to the next would be nearly impossible and we would have very weak connections around the entire body. The last pic is our finished work for the day.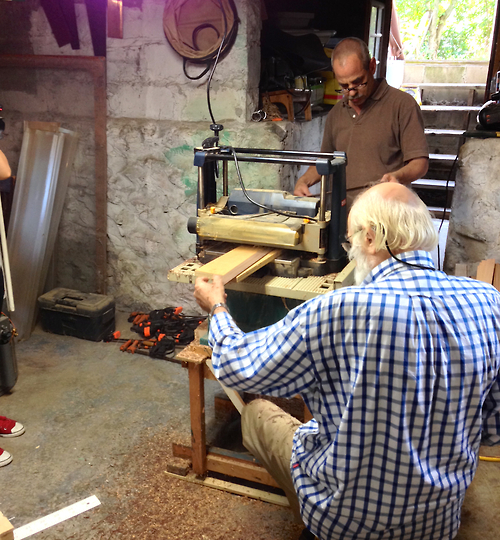
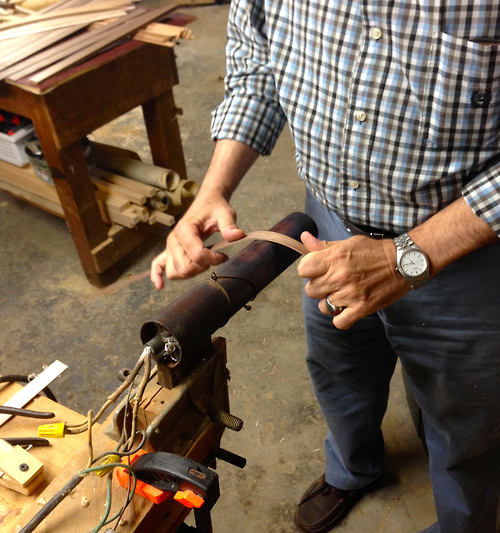
Step 9: Shape and glue your first stave. Now that we have milled wood for the staves, we can start shaping and gluing them to the mold. First we draw an outline of our master stave template on a choice piece of walnut and cut it to the outline with the band saw. The first pic below is a homemade bending iron that gets very hot when plugged in. The iron is hot enough to start bending when splashing water on it results in the water fizzing and immediately jumping off of the surface. Using a sponge, we wet the wood and slowly start the process of bending the stave to fit the mold (pics 2 and 3). This process is slow and a bit of patience is required in the beginning as you figure out how to get the wood to do what you want it to, going back and forth between the bending iron and the mold. When the stave fits over the mold without any serious gaps that would require pressing firmly on it to rectify, your done. The next step, which I mentioned in my last post, but is not pictured here, is to sand the edges of the stave. We must do this to get the edges to fit within our lines that we have drawn on the mold, but also so that the edges are at the correct angle for gluing to each other later. Once the stave fits in between the lines on our mold, we clamp it to the top of the mold and glue the two points to our end pieces, which will actually leave the mold and become a part of the finished instrument in the end (pics 4 and 5). Obviously, we don’t glue to the top of the mold, the clamps are there only to hold it in place. One very important last step is to clean up the excess glue from the staves and end pieces. It’s much easier to do now while the glue is wet than later and leaving it will make gluing the spacers and the following staves impossible. The glue has to dry before our next step, so we are done for the day. 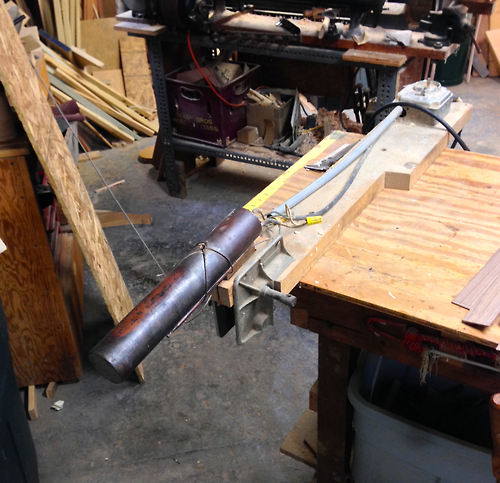
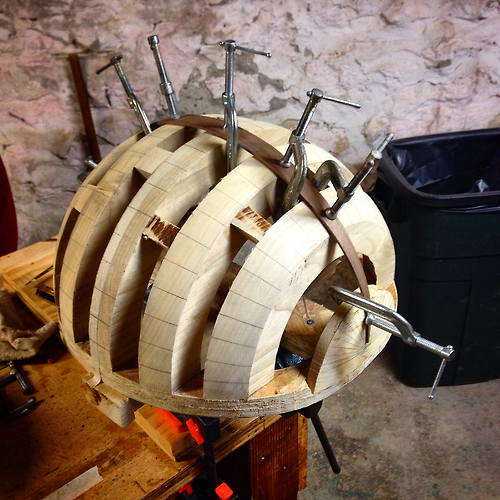
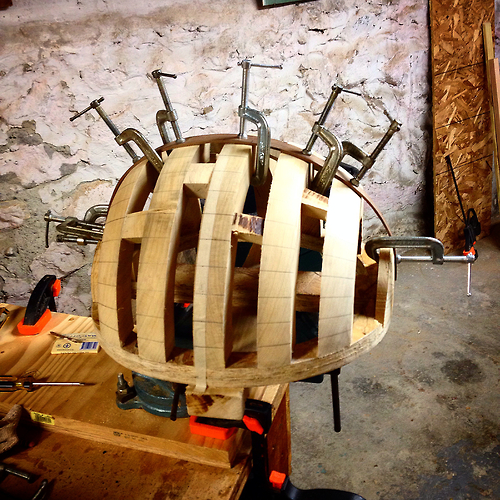
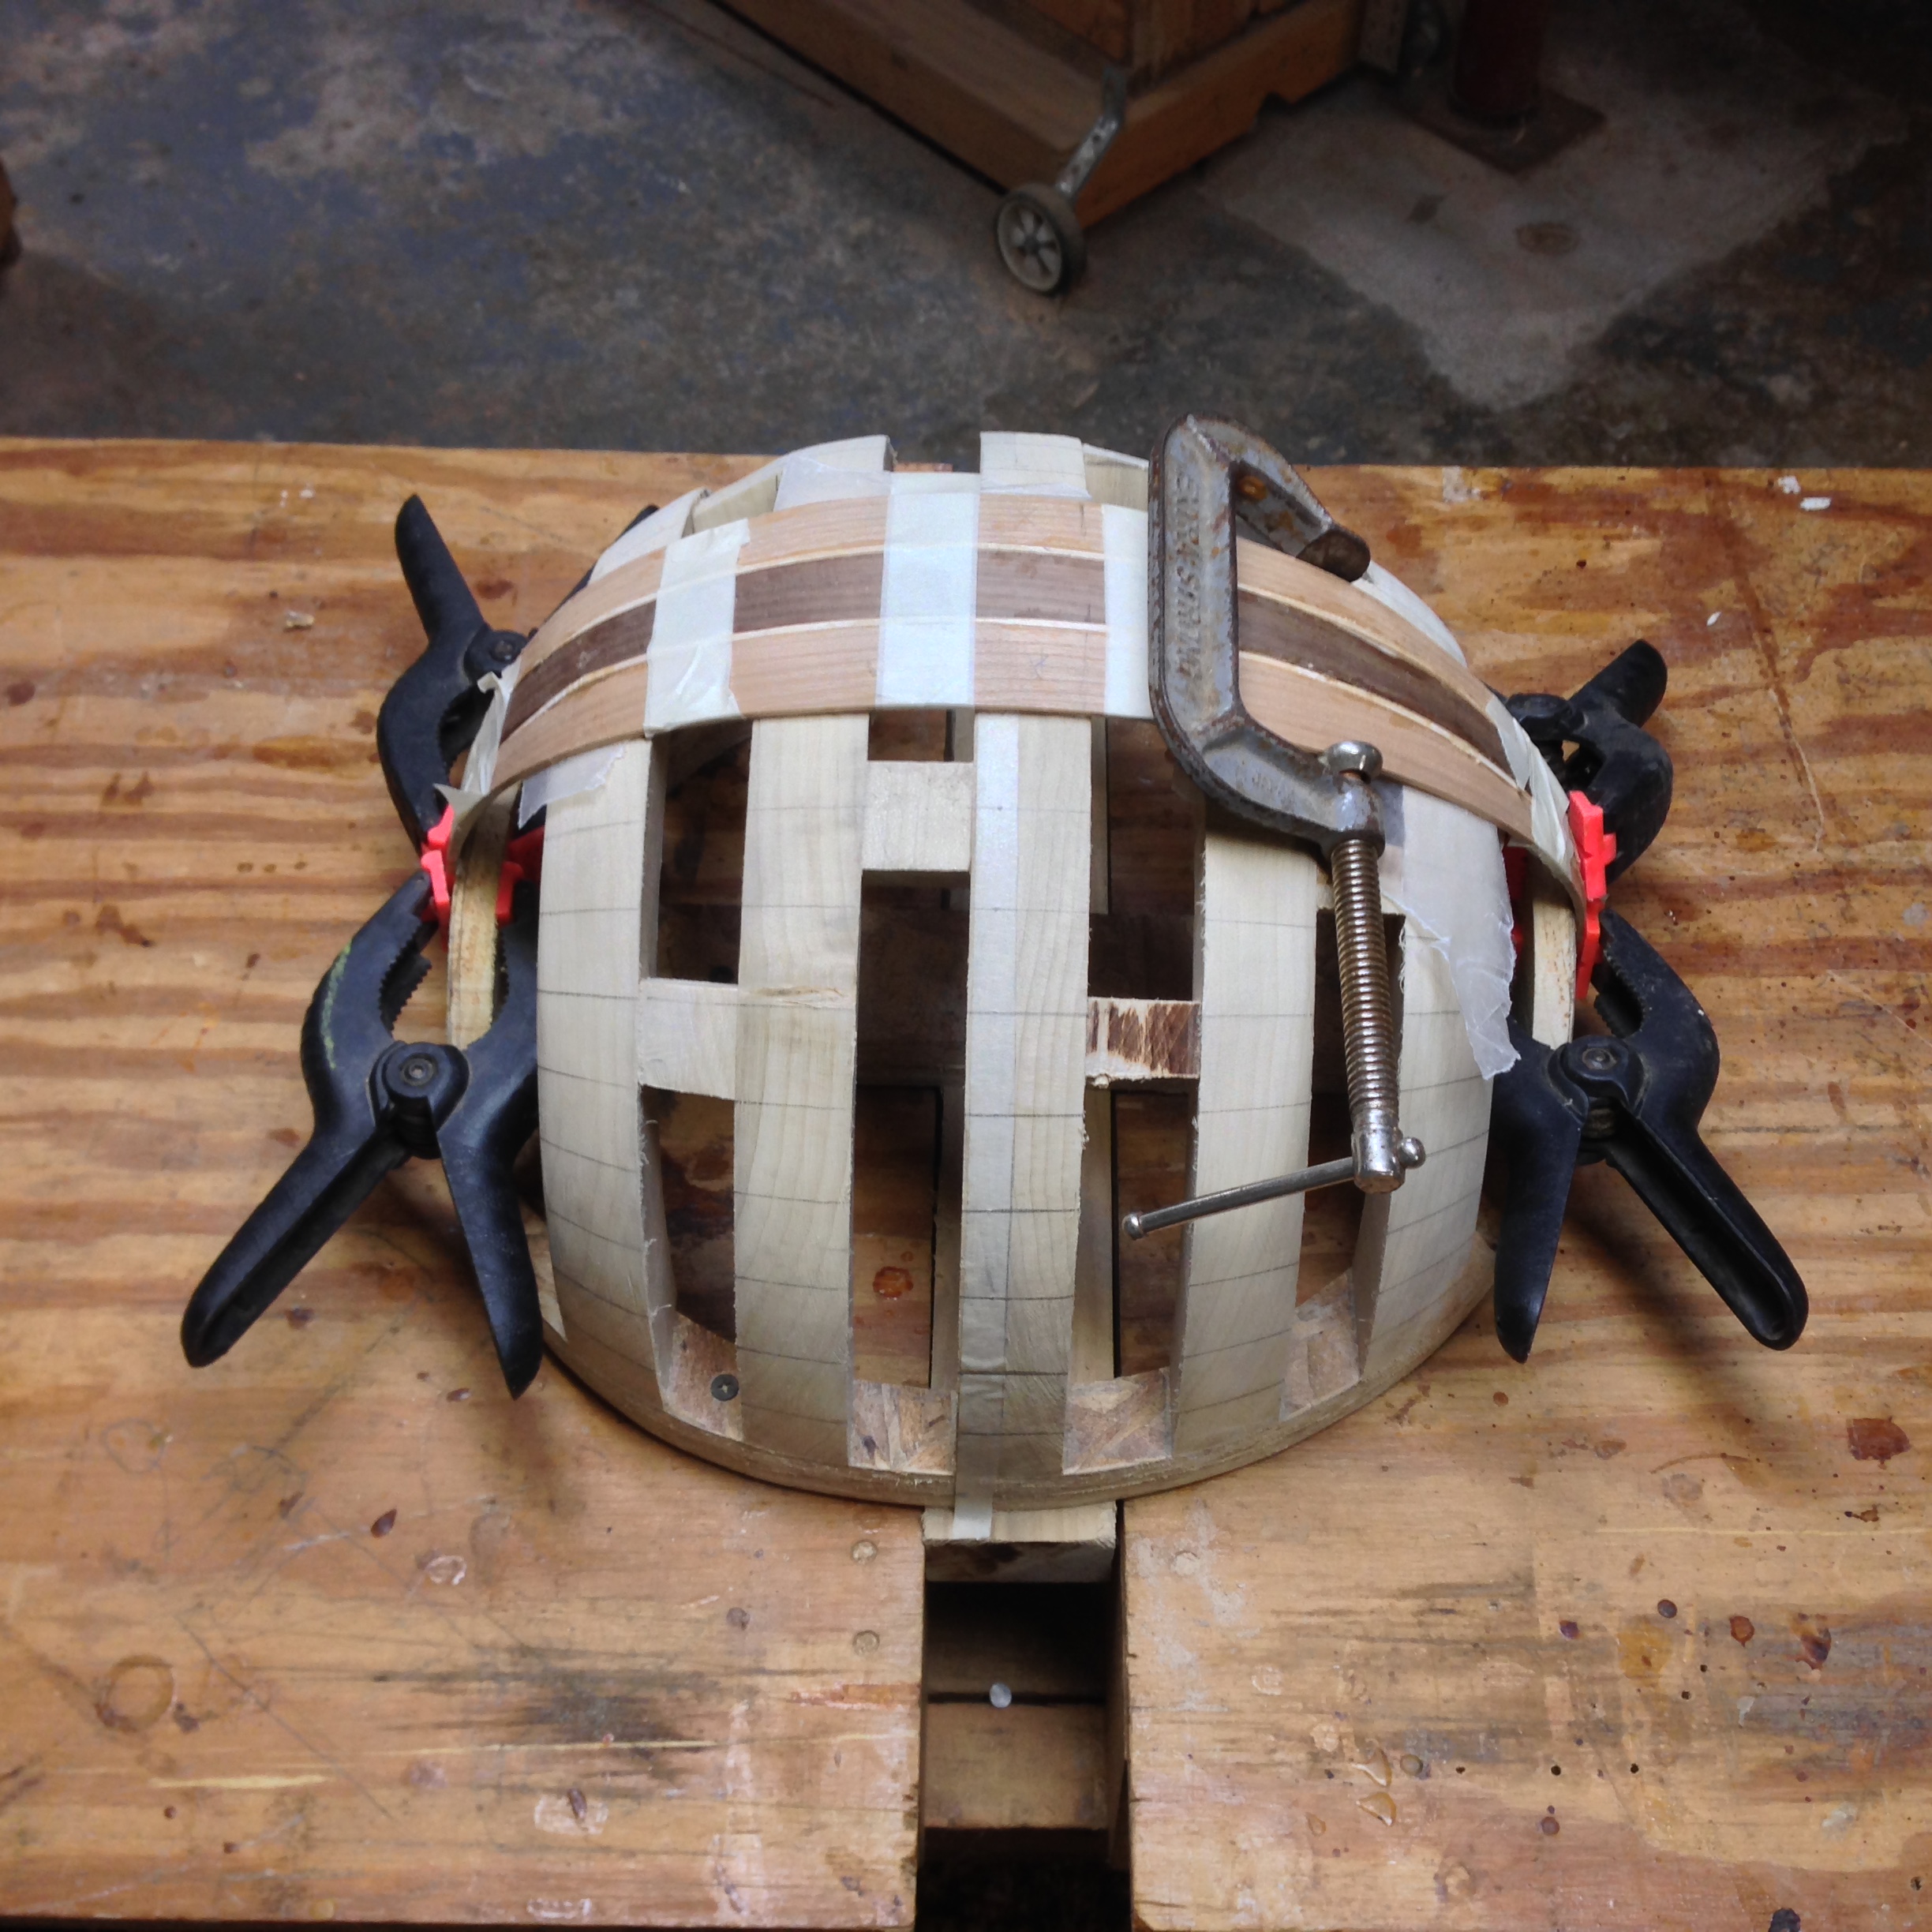
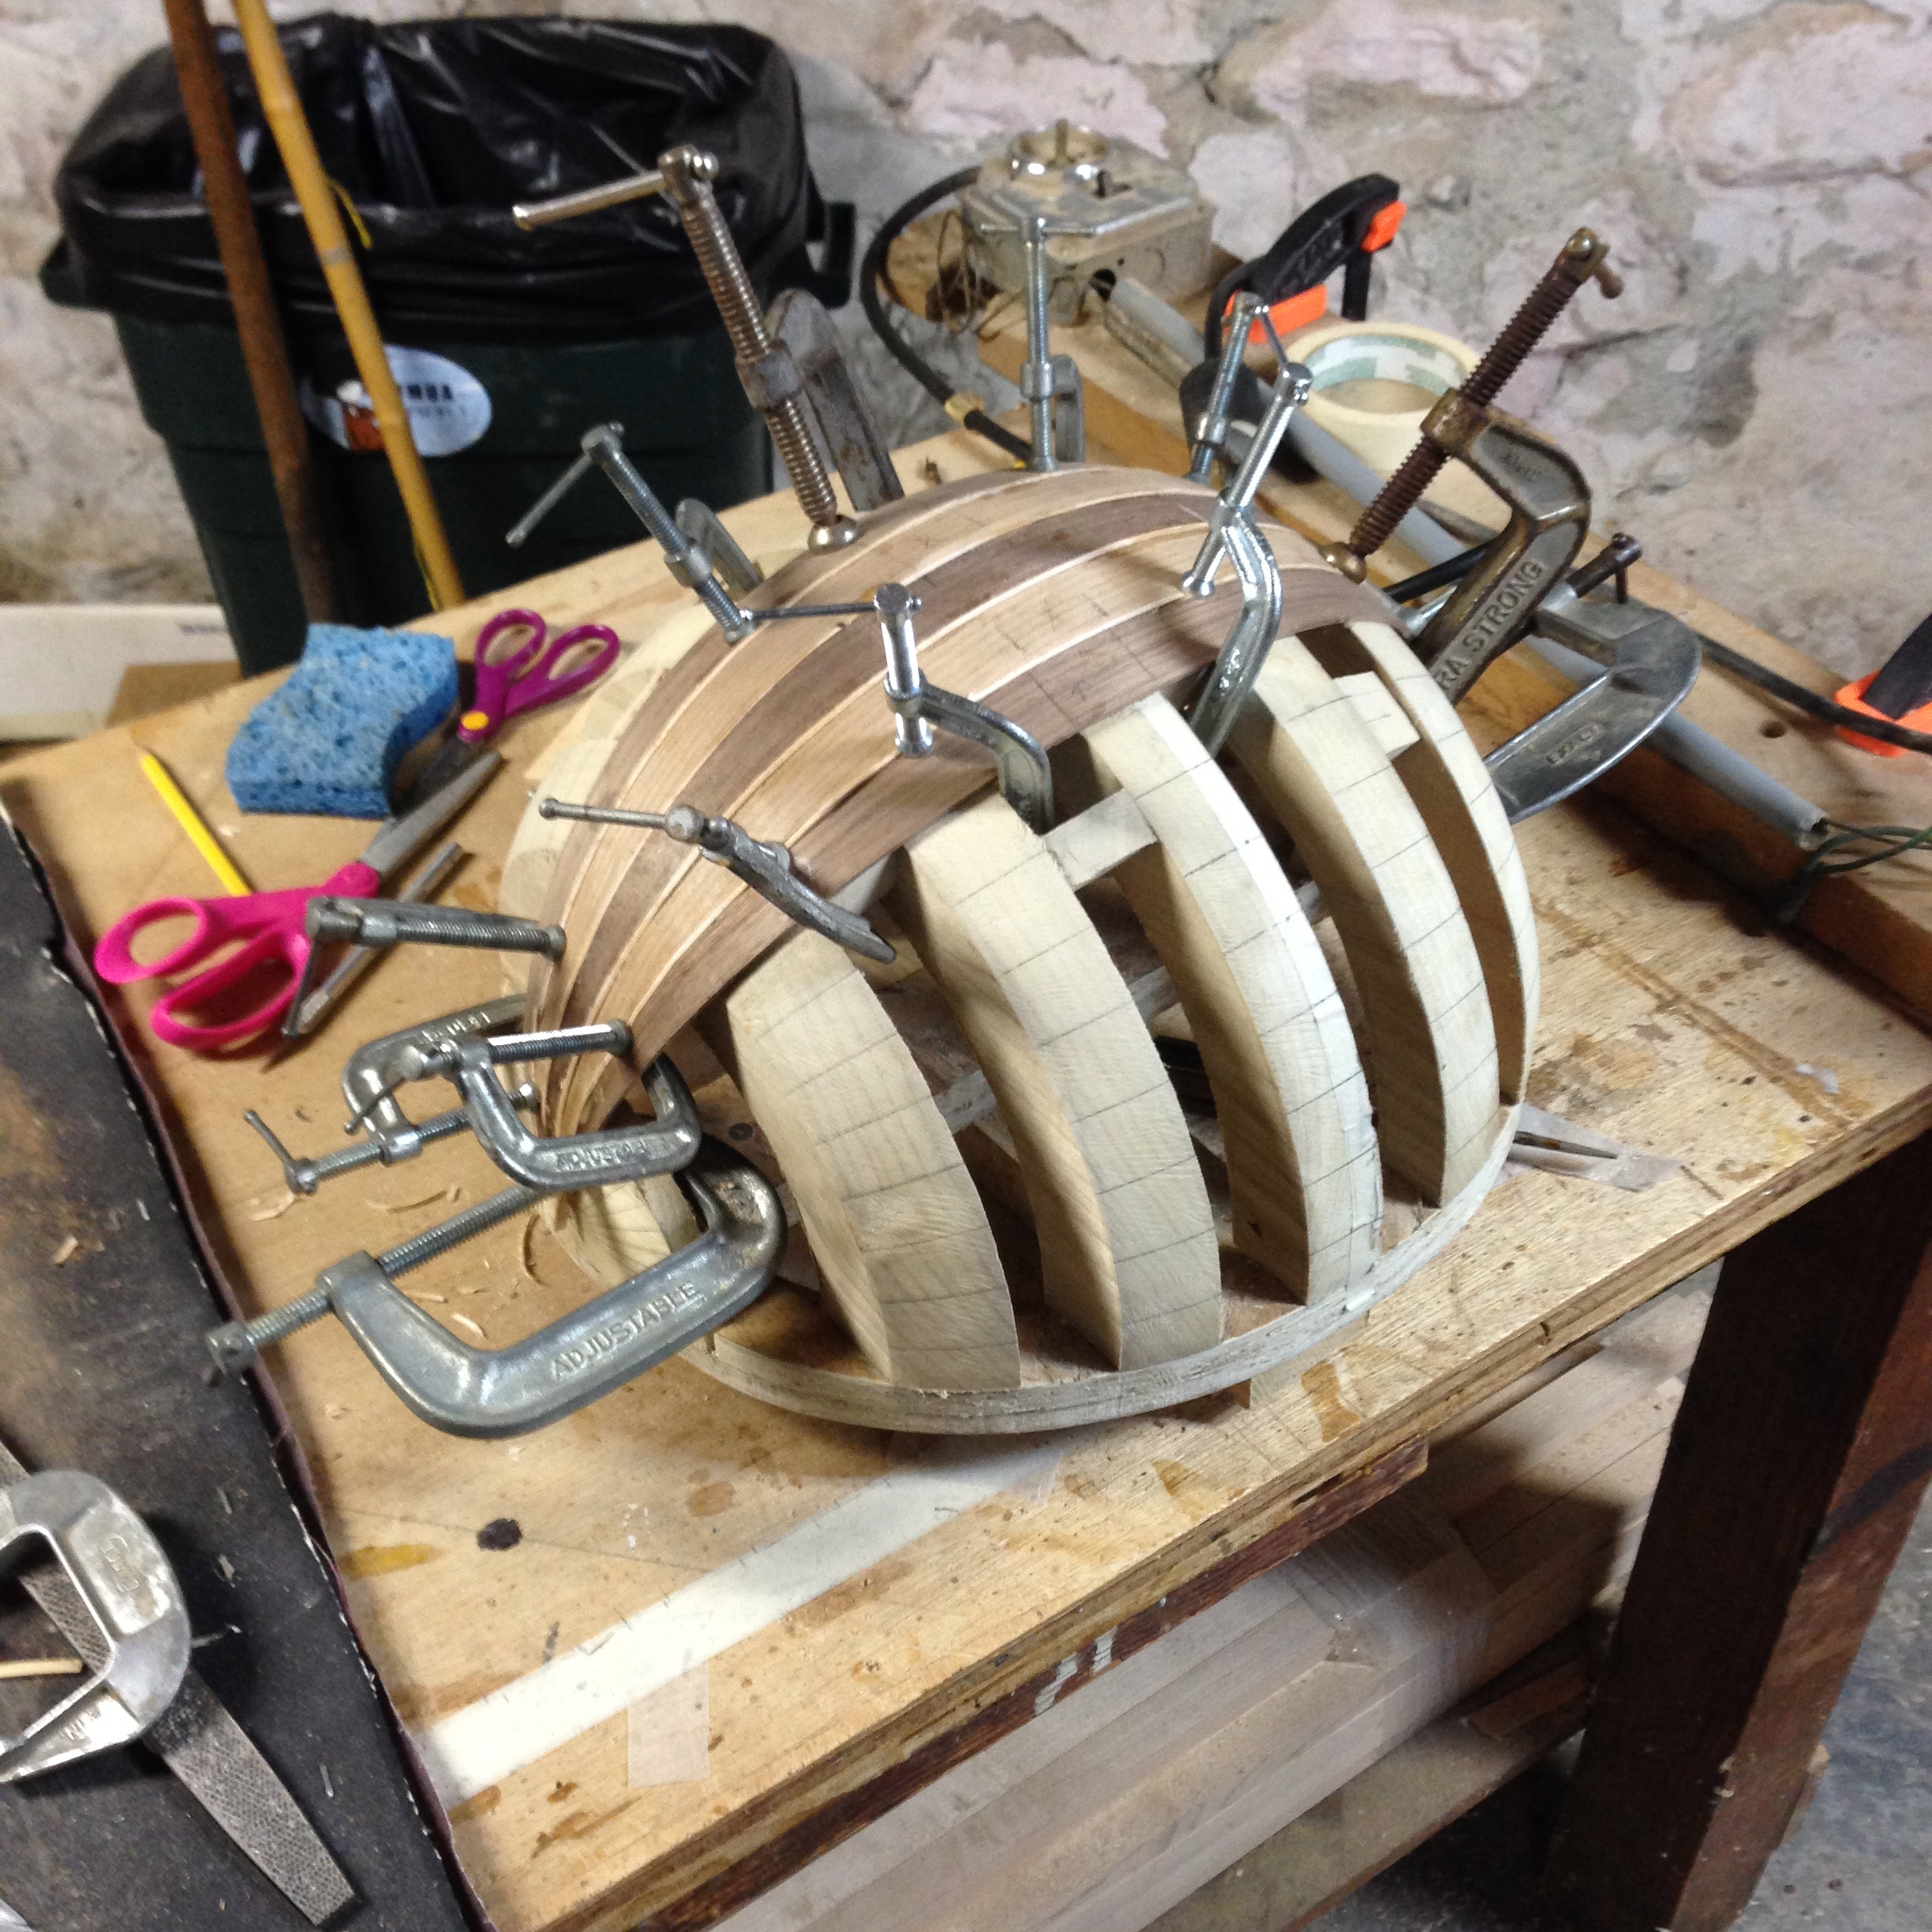
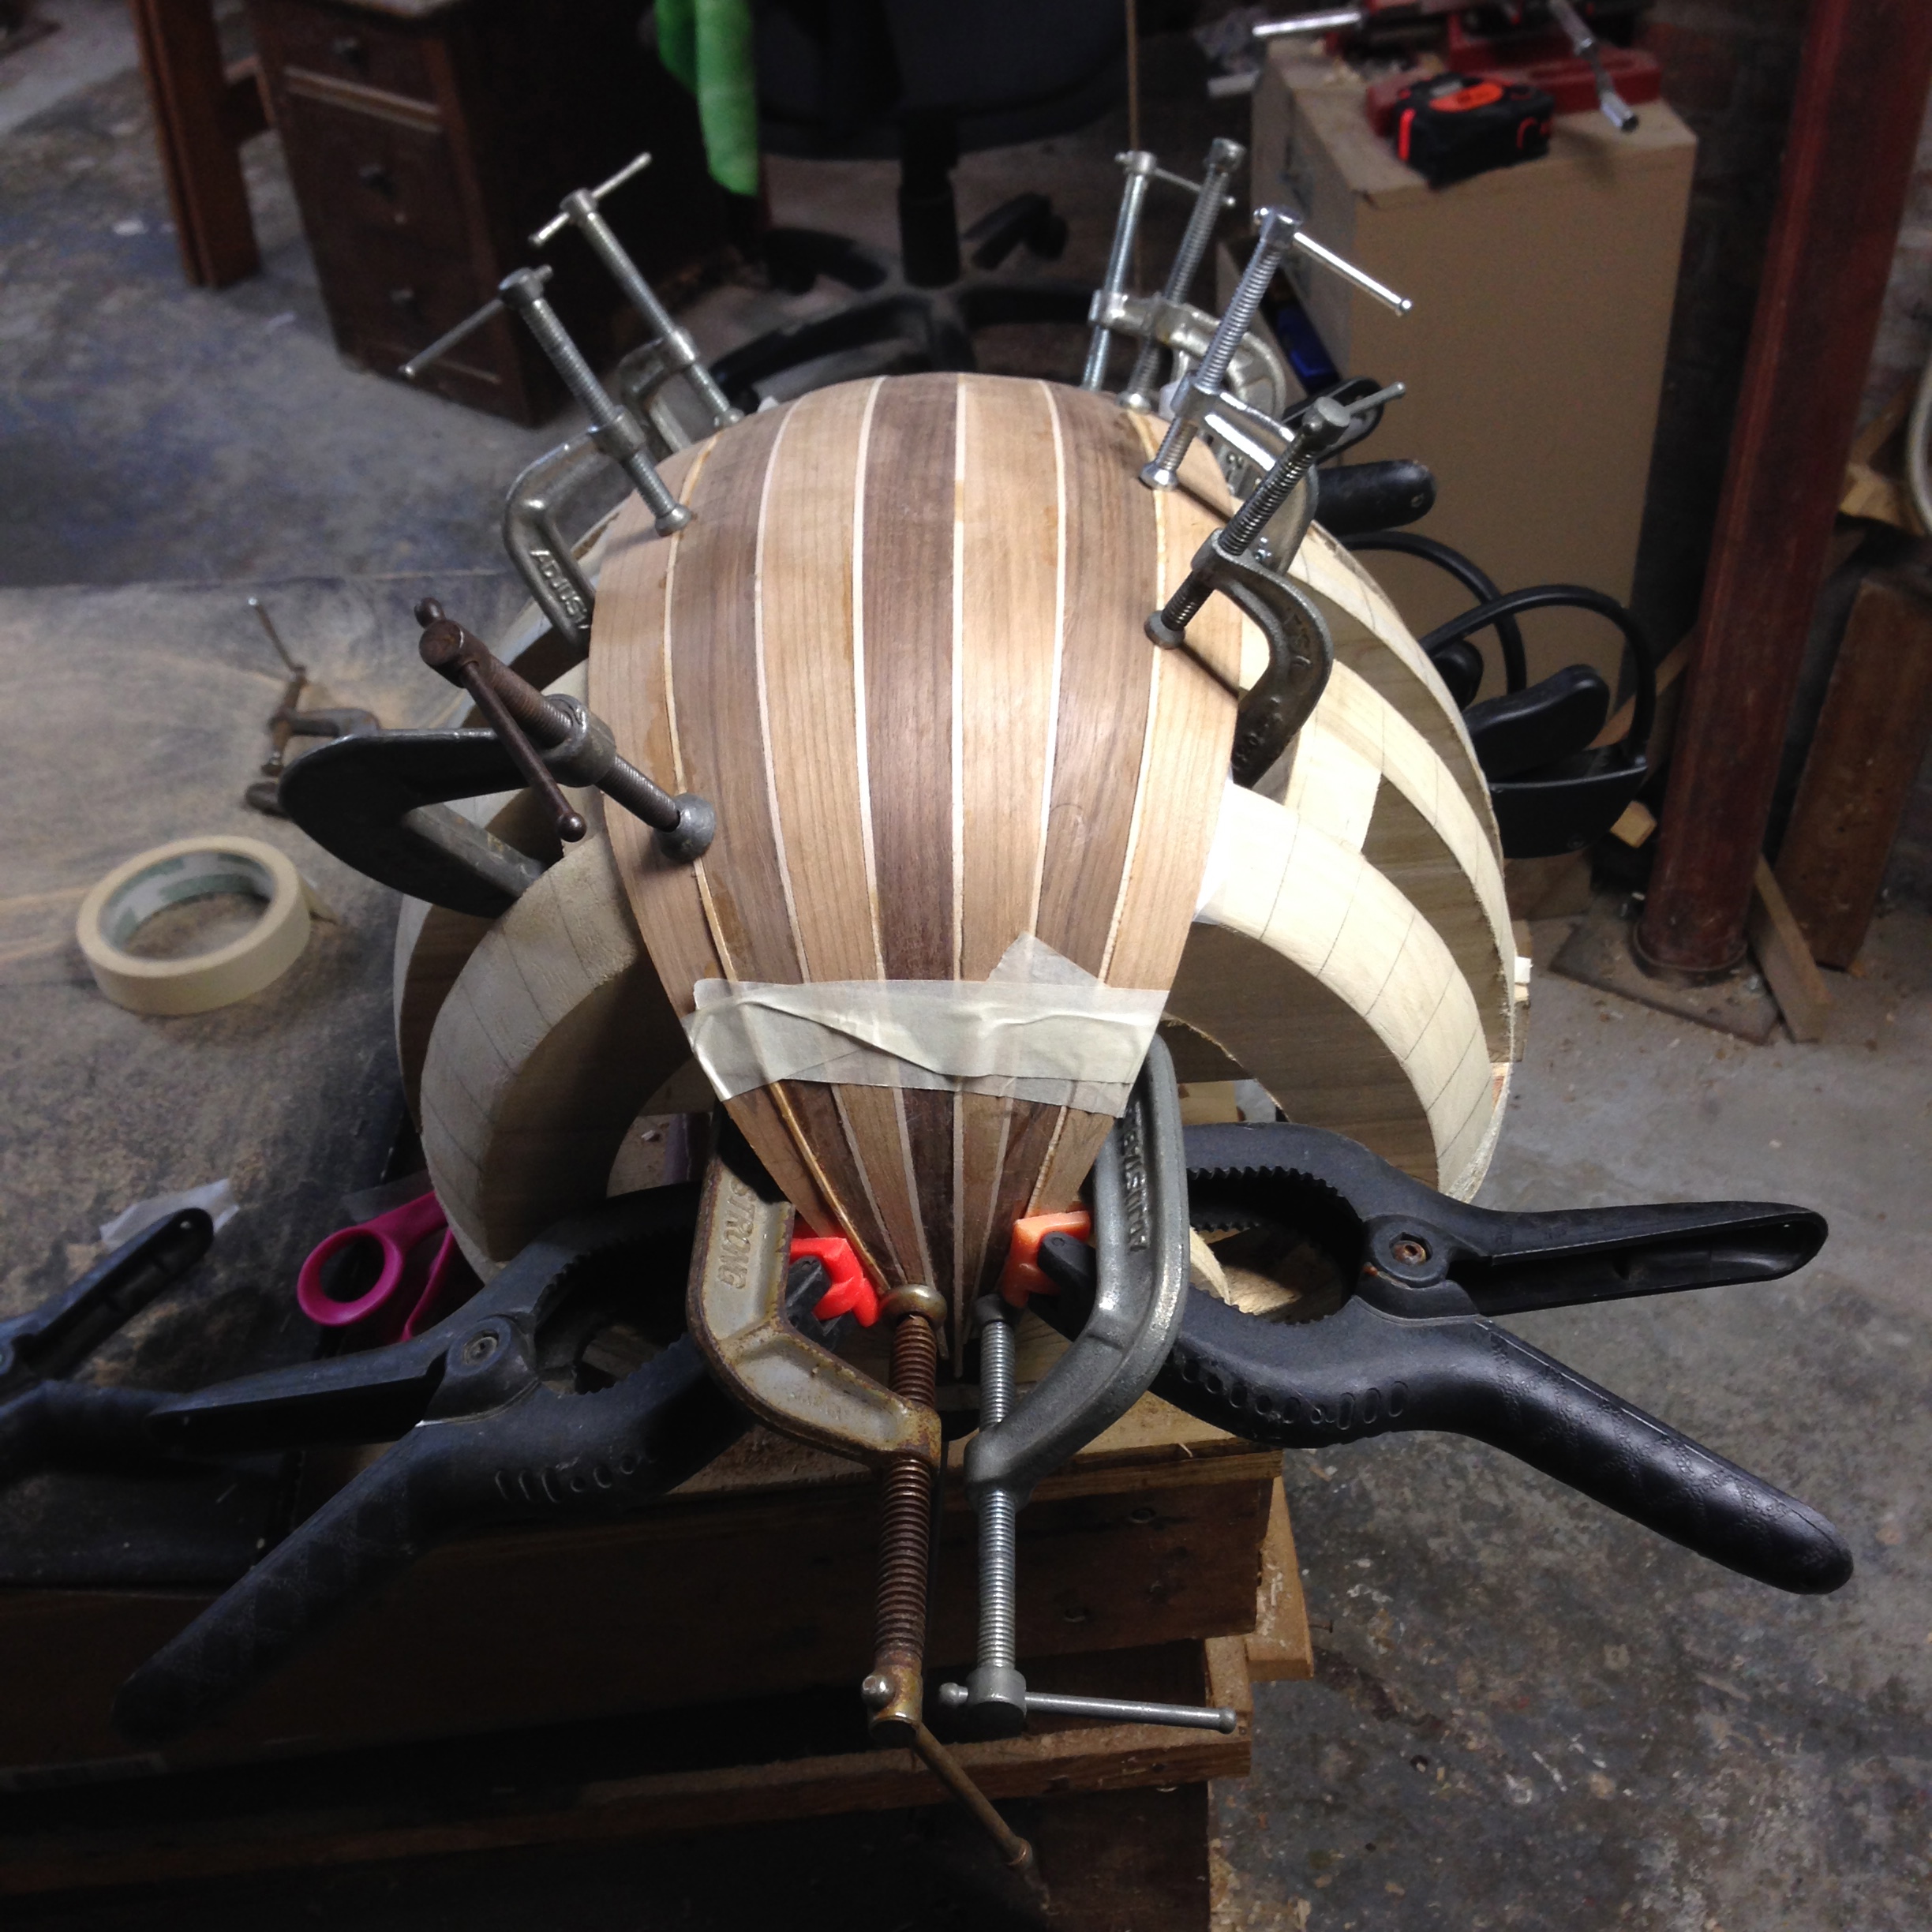
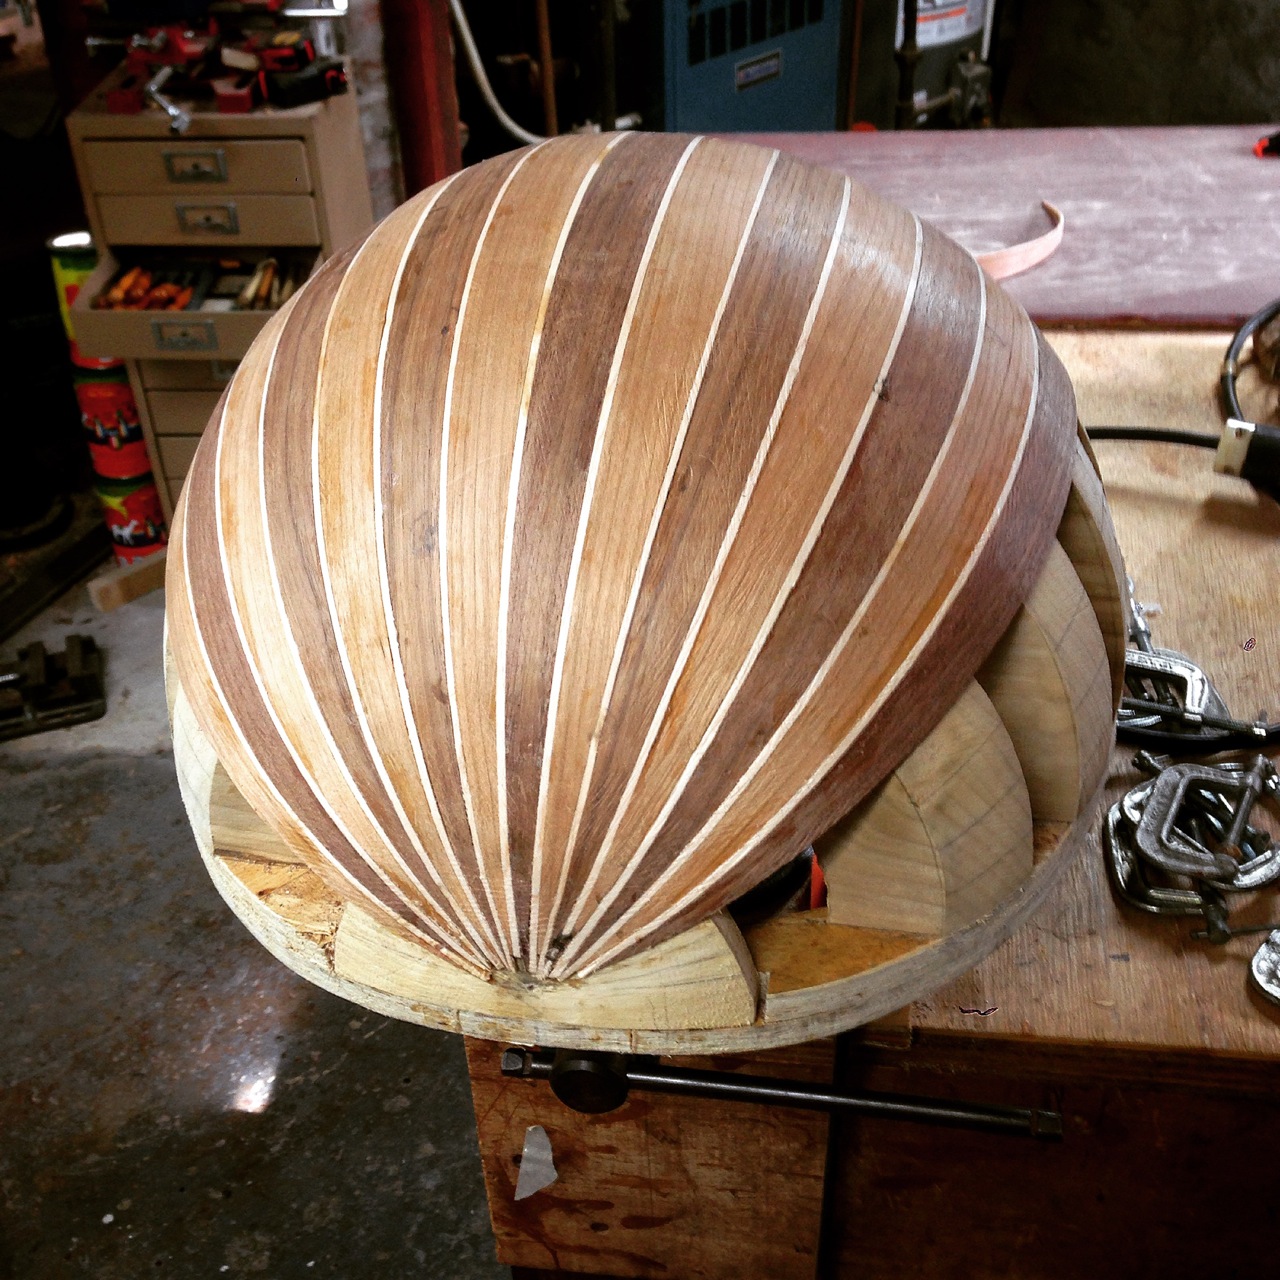
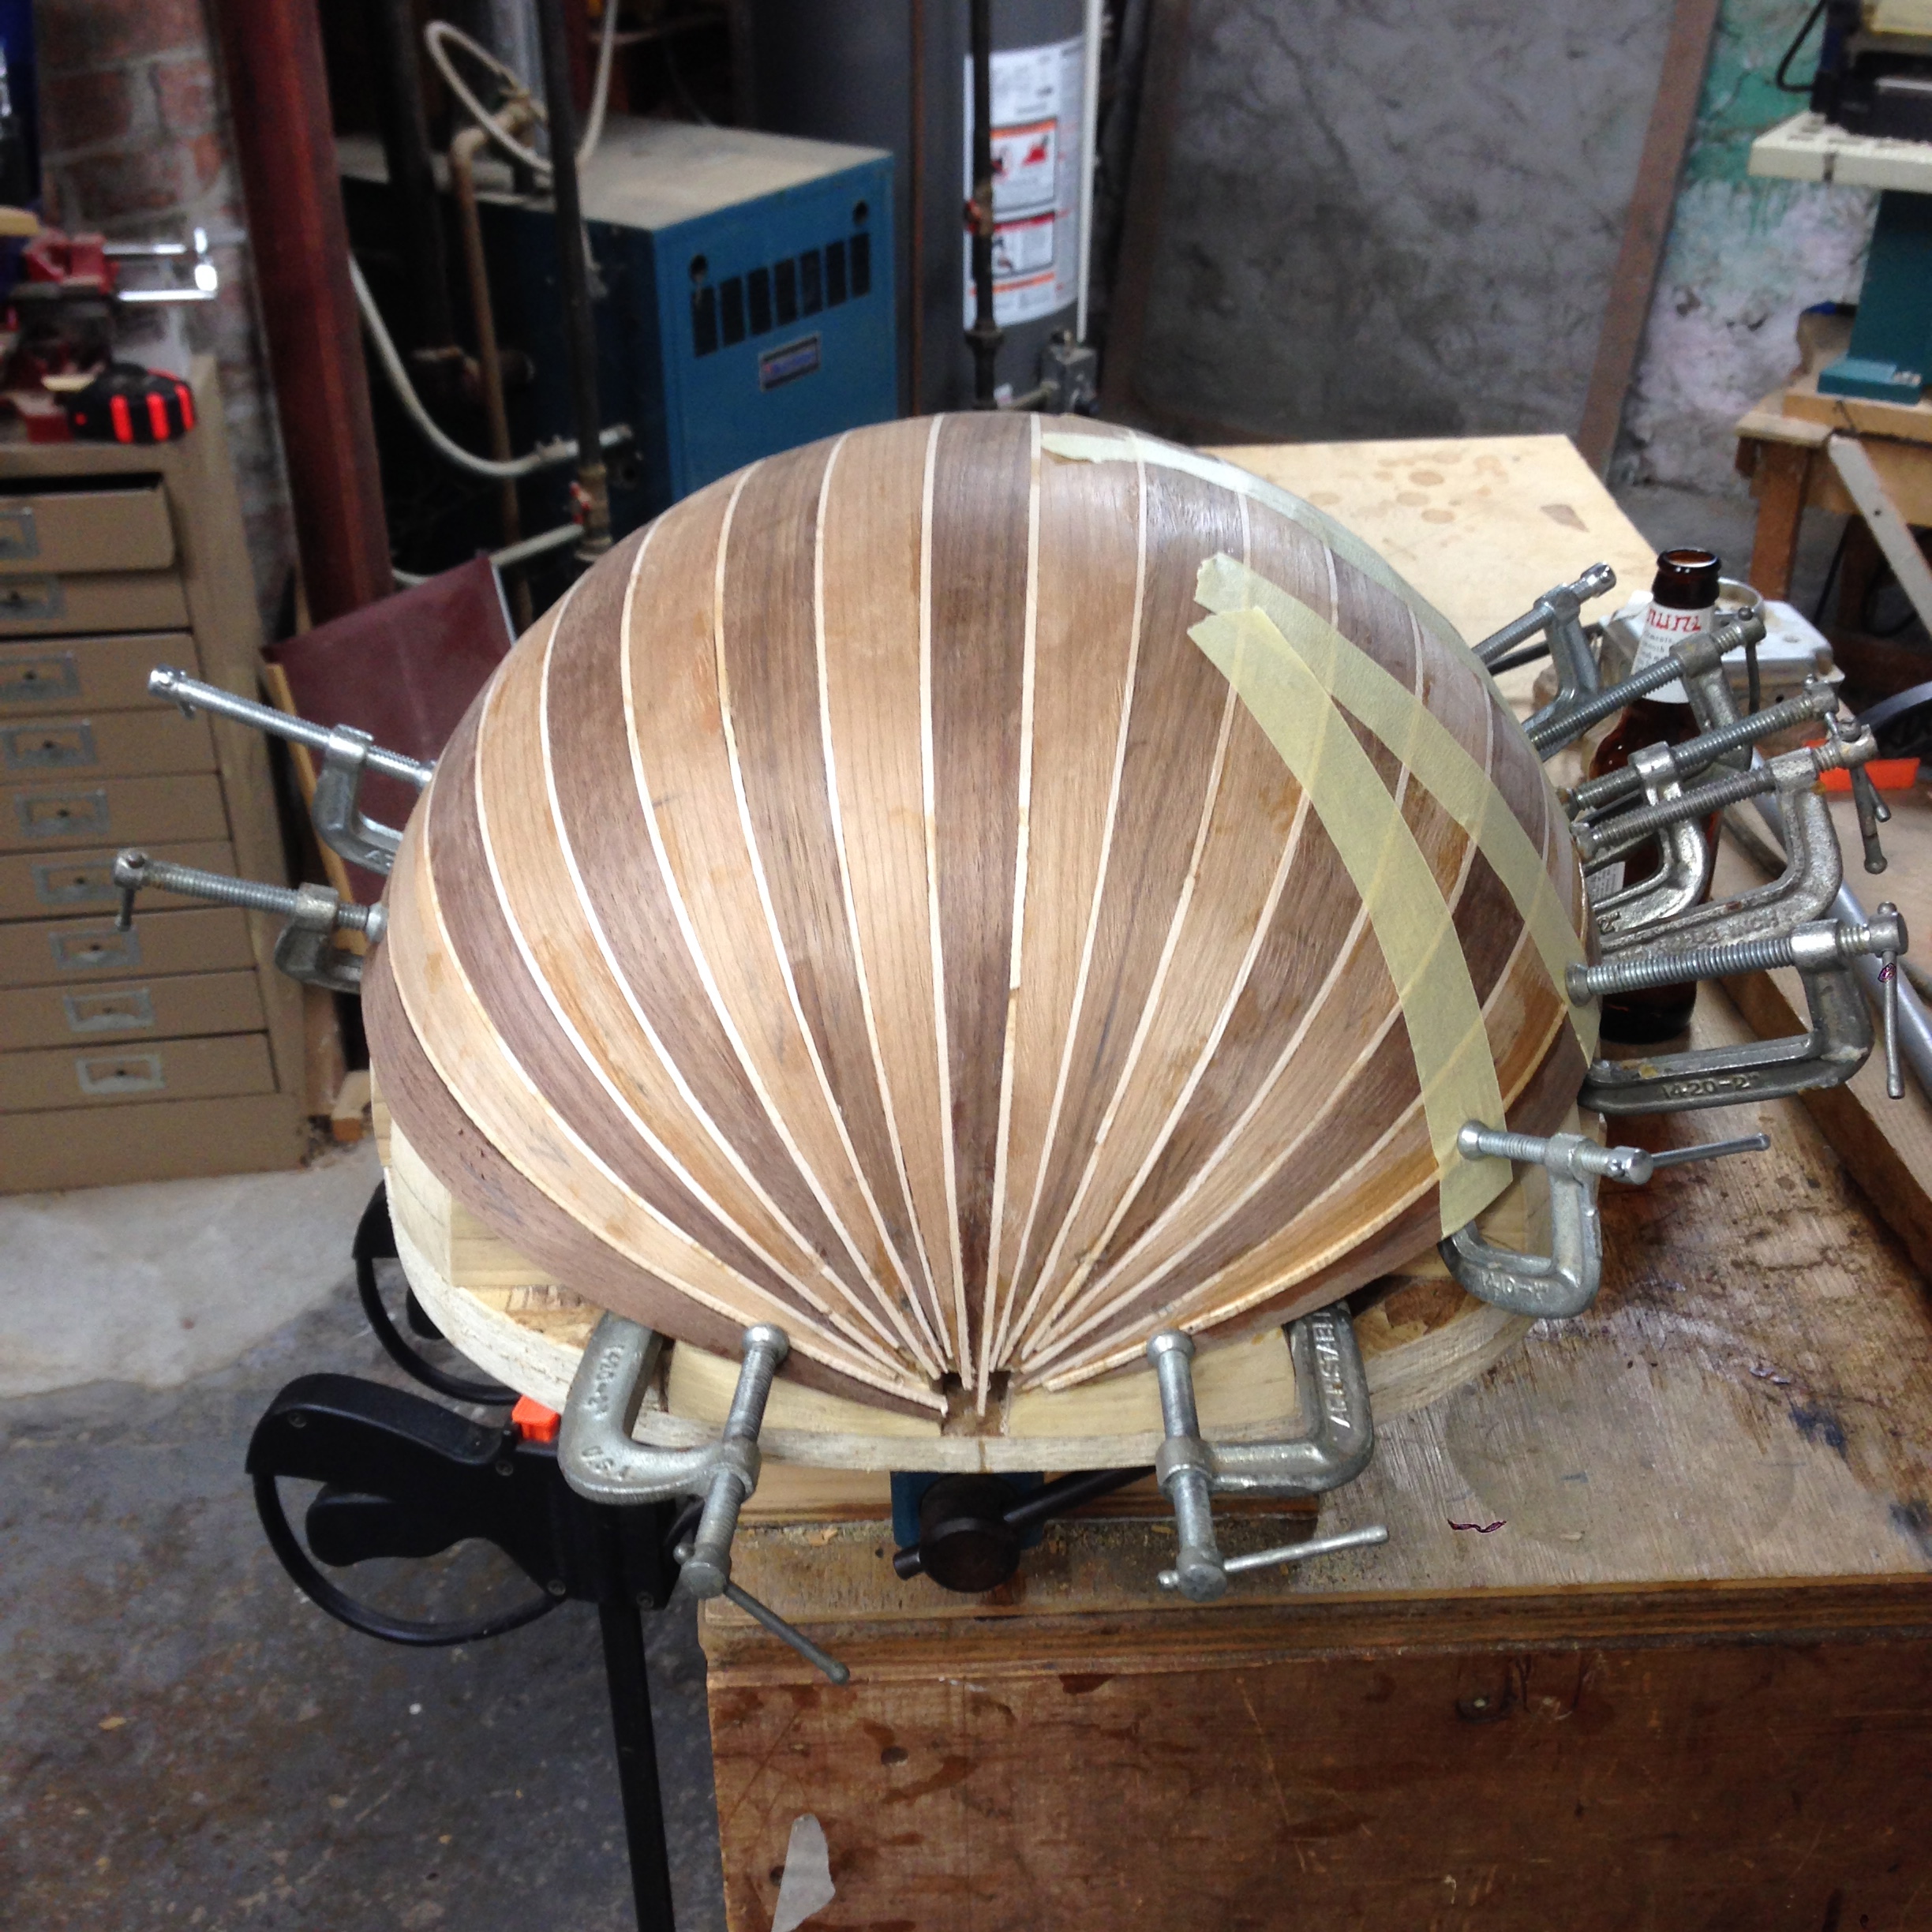
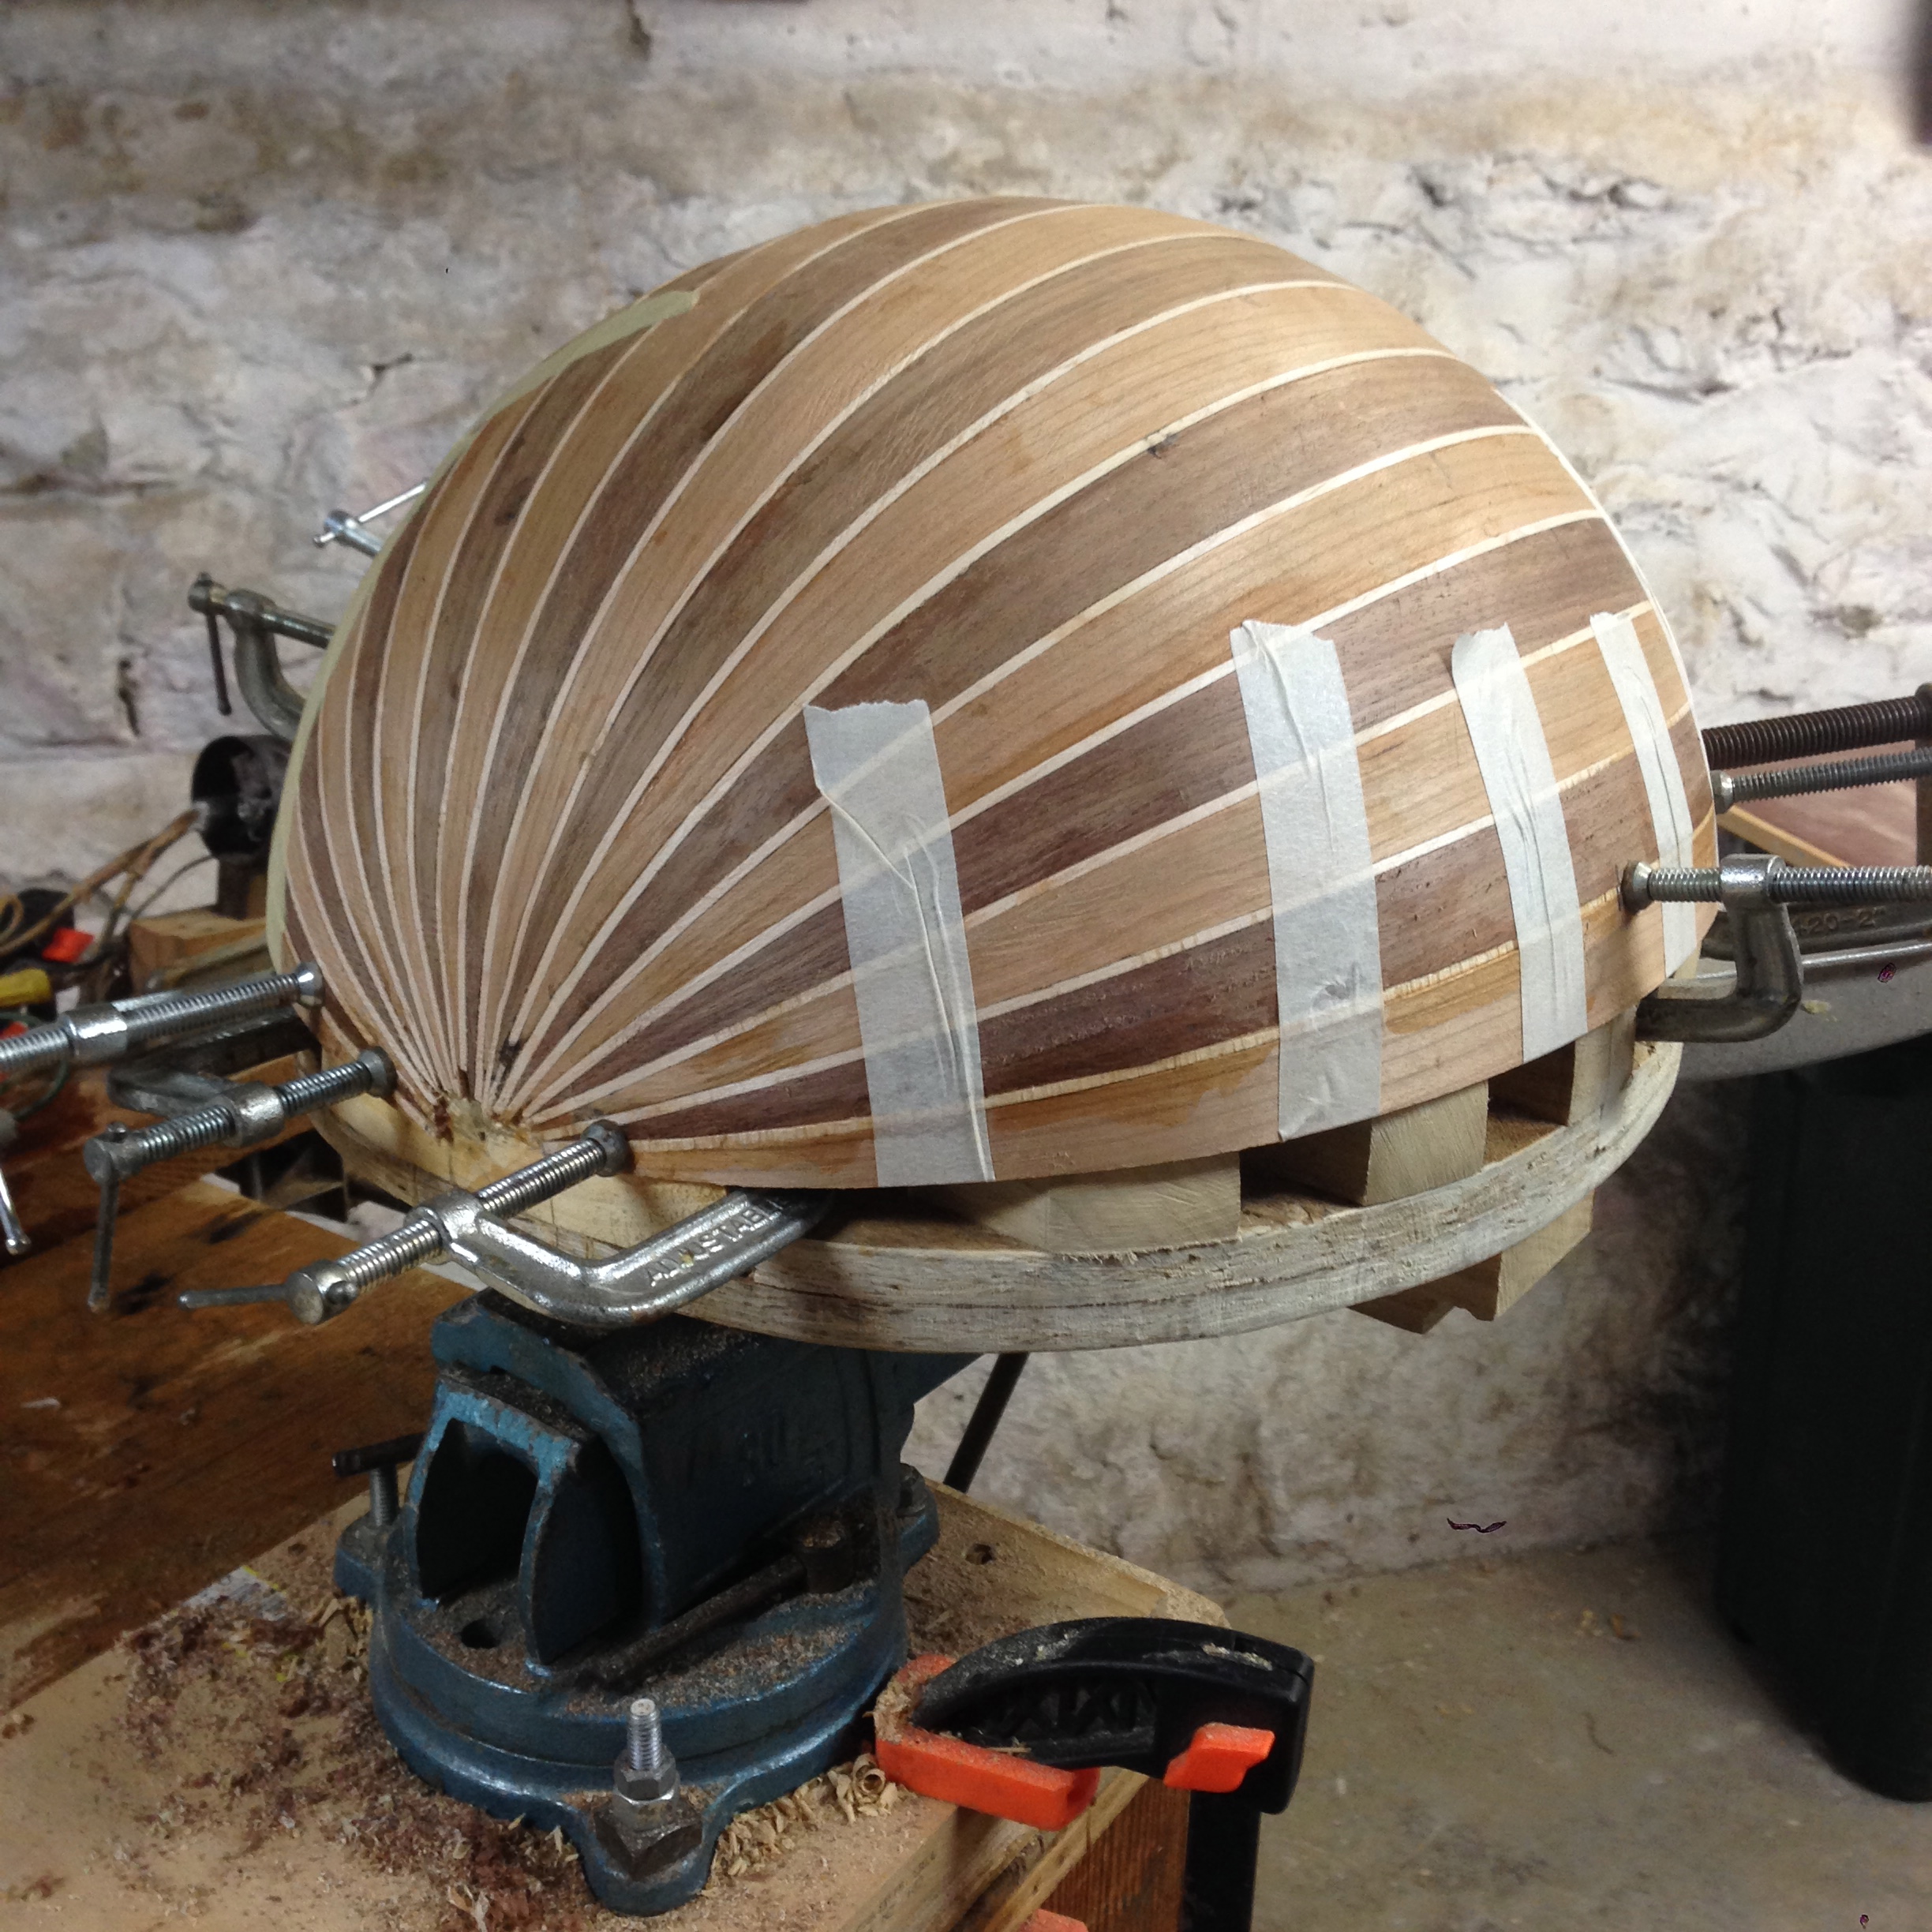
Step 10: Shape and glue the rest of the staves around the mold to create the bowl of the body. Much of the past year, when I have had time to work on the tanbur, has been spent shaping and gluing staves and spacers around the mold. It has been a long and slow process but the repetition involved has really helped me develop some better woodworking skills too, so it has been worthwhile. My process every time I would come to the wood shop would be to undo the clamps from my previous stave, rasp away any excess dried glue and inspect the connections, cut out a new stave from either the walnut reserves or the cherry reserves using my master stave template, roughly sand the edges, and use the bending iron (usually with some water) to bend the stave to fit the mold. Then I'd use my large sanding board to fine tune the stave shape to fit snug against the previous stave and within the lines drawn on the mold. We also milled some stave spacers out of maple (I think?) to be placed in between each stave. These spacers are mostly cosmetic as they give a nice contrasting color to both the cherry and the walnut used for the staves. I found the spacers to be a bit of a pain to deal with during gluing and their ungainliness was probably responsible for slight imperfections in the gluing process. They would also regularly break during bending because they are so delicate in comparison to the staves themselves. That said, they are nice touch and all of the problems they caused are in the end very fixable after the bowl is completed. The final two staves are larger than the rest and are a bit more difficult to glue properly because of their size and related inflexibility, and because you have to be careful about accidentally gluing them to the rim of the mold. Eventually their edges will be planed and rasped to be flush with the bottom of the mold. Here are some pics of my progress throughout the Fall/Winter/Spring: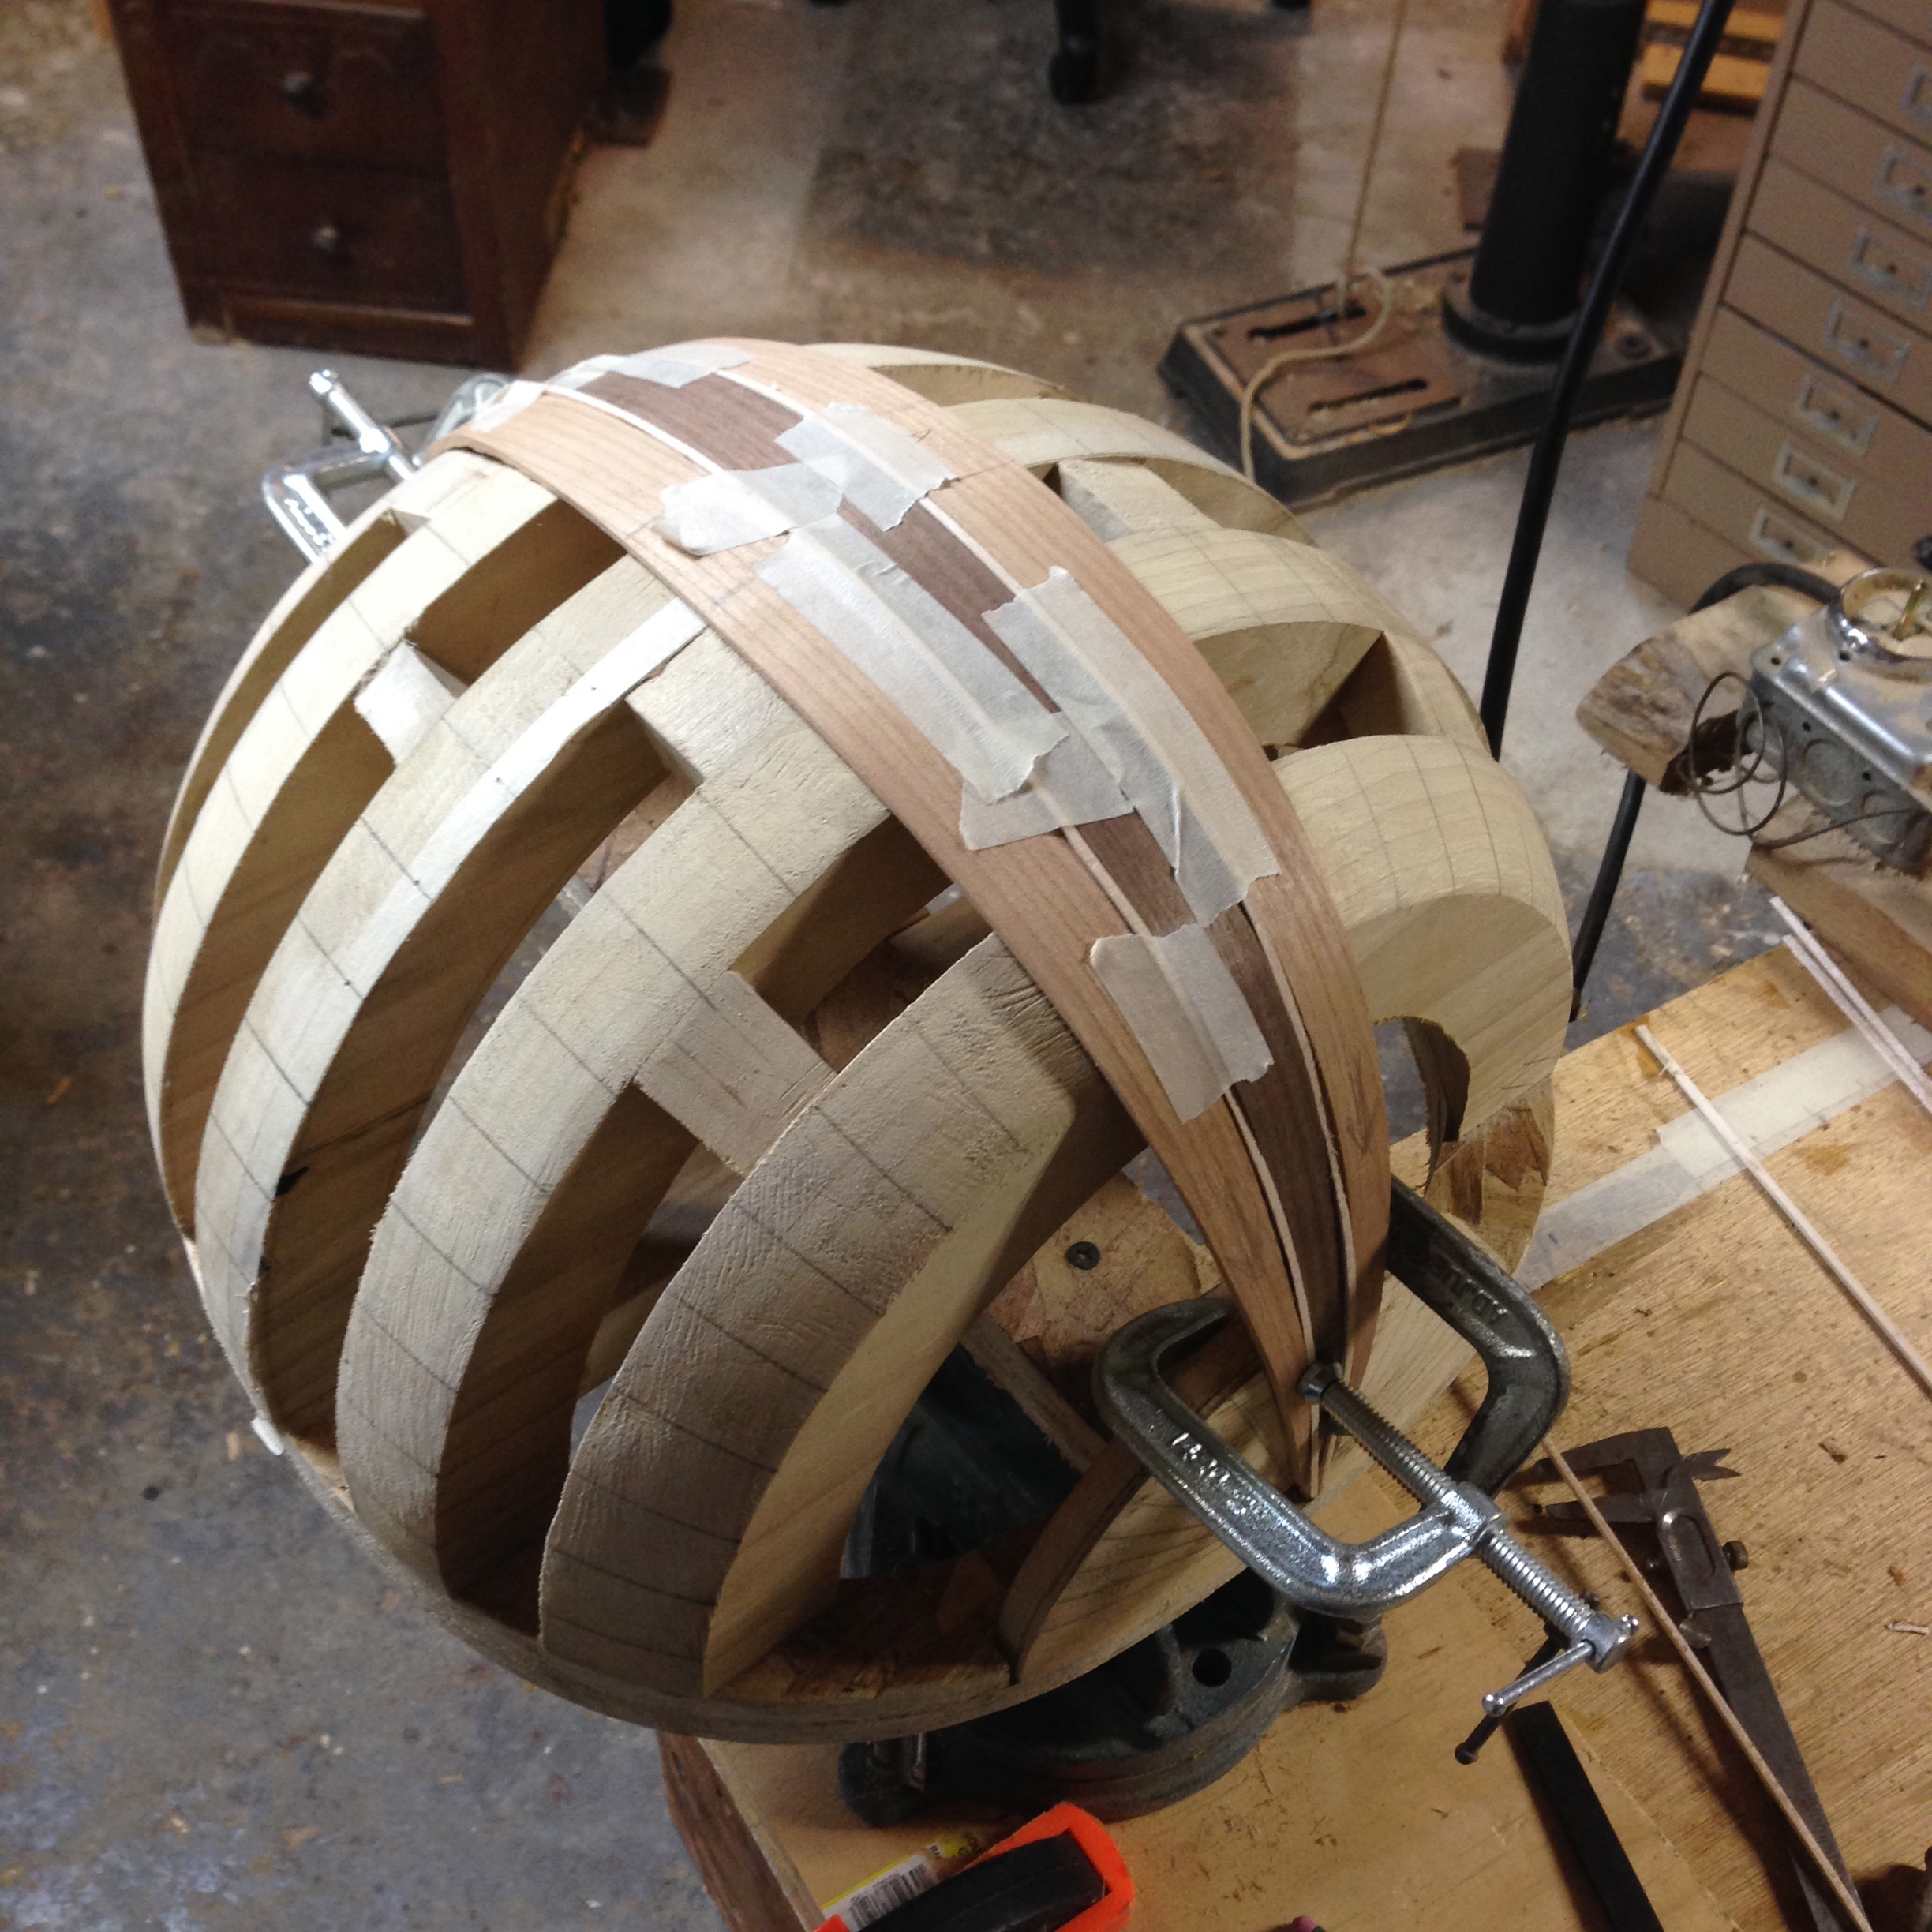

To be continued....
Ottoman Art Music
I recently had the opportunity to teach a masterclass on Ottoman Art Music to guitar majors and students in the Introduction to World Music class at Northern Arizona University. I was in Flagstaff, AZ for a performance at NAU with Mr. Ho’s Orchestrotica and the masterclass was part of my visit to the campus. In addition to the topics listed below, we also discussed microtonality in Turkish music, the gap between the description of microtonality in Turkish music theory and actual practice, and some of the conventions in performing the music. Rather than do a new posting this month on one of the many plucked string instruments I play, I thought I’d include some of my notes for this masterclass. Please realize that this is an enormous topic. Ottoman art music has a history of over 500 years with a wide range of repertoire, composers, and practitioners. Those listed here are only the most prominent in my personal experience of this music and are probably a good place to start for the uninitiated Western musician, but this is by no means an exhaustive posting. Of particular interest to Western musicians wishing to learn more about this music will be the resources listed at the bottom of this post.
I play Ottoman Art Music on tanbur and oud, both of which I will post about on this page in the coming months. As always, your questions and comments are welcome, so please contact me.
Basic Terms:
Makam - scale or mode on which improvisation and compositions are based
Seyir - literally a "pathway" through a makam that shows directionality (ascending, ascending/descending, descending) and signature licks
Peşrev - slow, stately instrumental prelude written for a particular makam, generally the form is divided in 3-4 verses with a refrain
Hane - verse
Teslim - refrain
Saz Semaisi - slightly faster Ottoman art composition, generally performed after a paired pesrev, usually in 10/8, with the 4th verse in 3/4 or 6/8
Taksim - improvisation based on a makam, sometimes can act as a transition between makam
Şarkı - light classical vocal piece
Oyun Havası - dance tune
Fasıl - A suite consisting of a pesrev, a saz semaisi, and several şarkı separated by taksim, and concluding with oyun havası
Ney - end blown reed flute
Kemençe - upright bowed instrument that sits in lap
Tanbur - long neck lute with tie-on adjustable frets that show the theory behind Ottoman music
Oud - Arabic or possibly Persian precursor to the European lute and therefore ancestor to the guitar
Lafta - lute, similar in size and shape to the oud, but with tie-on adjustable frets
Kanun - plucked zither
Bendir - frame drum
Kudüm - copper bowl shaped drum pair, often used for Mevlevi music
Mevlevi - Sufi order associated with Islamic mysticism
Sema - the "turning" ceremony associated with Mevlevi dervishes
Ayın - sacred music used in the sema
Bağlama - long neck lute, somewhat like a simplified version of the tanbur, used for Turkish folk music
Kopuz - early version of bağlama, without doubled strings, often played fingerstyle in modern Turkish folk music
Common Transpositions: mansur (concert), kız (up M2nd), bolahenk (up P5th)
Notable Composers: (too many to list, but here is a start)
Ismail Hakki Bey (1865–1927)
Tanburi Cemil Bey (1871–1916)
Tanbûrî Osman Bey (1816–1885)
Nayi Osman Dede (1652–1730)
Neyzen Aziz Dede (1840–1905)
Ismail Dede Efendi(1778–1846)
Kemani Tatyos Efendi (1855–1913)
Neyzen Dede Salih Efendi (1818–1888)
Refik Fersan (1893–1965)
Gazi Giray Han (1554–1607)
Tanbûrî Isak (1745–1814)
Dimitri Kamtemir (1673–1723)
Yusuf Paşa (1840–1895)
Modern Performers of Ottoman Art Music:
Niyazi Sayin - ney
Ihsan Özgen - kemençe
Neçdet Yaşar - tanbur
Fahrettin Çimenli - yayli tanbur
Salih Bilgin - ney
Murat Aydemir - tanbur and lafta
Derya Turkan - kemençe
Murat Salim Tokaç - ney and tanbur
Necati Celik - oud
Notable Turkish folk musicians:
Erkan Oğur - kopuz, fretless guitar
Erdal Erzincan - bağlama
Erol Parlak - bağlama
Ali Ekber Çiçek - bağlama
Arif Sağ - bağlama
Okan Murat Öztürk - bağlama
Özlem Özdil - bağlama
Resources for Western Musicians:
Turkish Music Makam Guide by Murat Aydemir (Pan Yayıncılık 2010)
Türk Musikisi Nazariyatı ve Usulleri by Ismail Hakkı Özkan (Ötüken 1984)
Makam: Modal Practice in Turkish Art Music by Karl Signell (1977)
www.neyzen.com (archive of notated music)
http://www.trtkulliyat.com (archive of notated music)
www.semazen.net (sema and ayin info)
Kalan Müzik - Turkish music label
Bağlama Metodu by Arif Sağ and Erdal Erzincan (Pan Yayıncılık 2010)
www.tulumba.com (online store for all things Turkish)
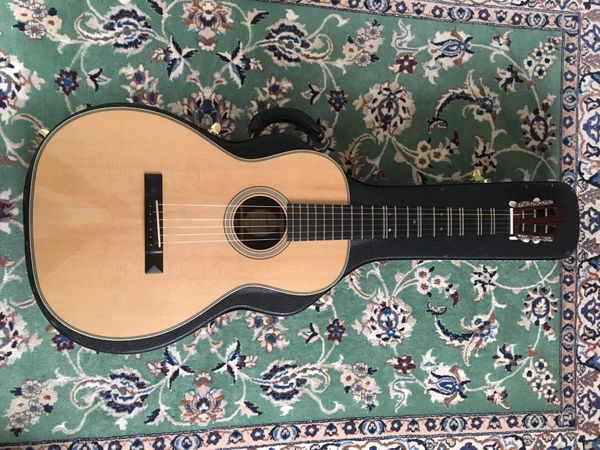
The Alterna-Telli, additional Fretwork by Jon Mouradian.